Question:
What are the steps to save my data to the xD card?
Answer:
All references to the “PC3” apply equally to both the PC3 and X-Pro models.
The PC3 storage interface permits taking a very wide or narrow view of what you can select to save from the PC3’s memory. You can save every item in user memory, save custom groupings or be as selective as saving just one single object. Your choice. For complete details on all the selection options available, please see the PC3 Owner’s Manual starting on pg. 13-4.
The following example illustrates saving all object types from a select range.
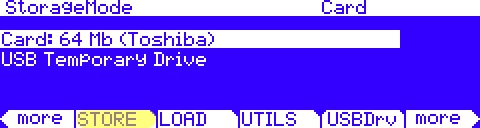
1) Insert a compatible xD card into the back panel xD card slot, marked “Storage”.
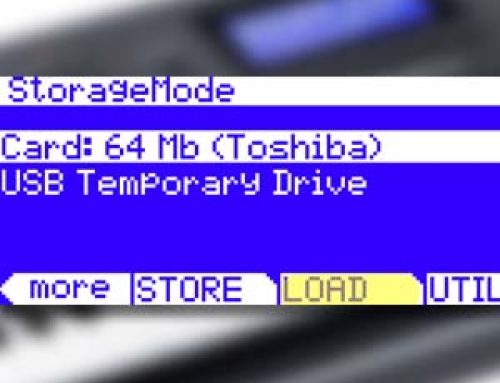
2) Press the front panel STORAGE mode button, you will see:
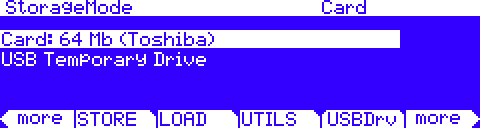
Where next to”Card:” will be displayed the size and manufacturer of card inserted.
3) Press [STORE]:
4) In the left hand column select the “Object Type” you wish to save by highlighting your choice(s). Press [Select]. Here we are selecting “All types” (an * marks your selections).
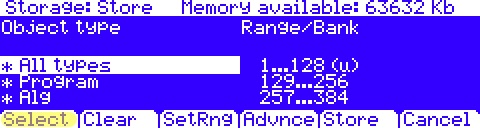
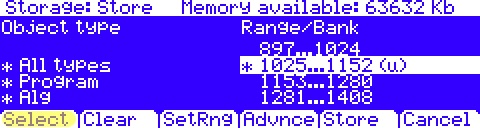
5) In the right hand “Range/Bank” column select the ID range(s) where the content you wish to save resides by highlighting that numerical range(s) and pressing [Select], again an * marks your selections (note a (u) appears next to any range as a reminder of where user objects of the currently selected type reside in RAM).
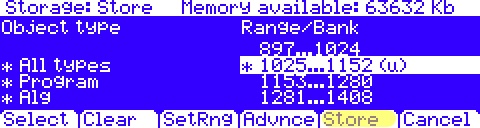
6) Press [Store] when your selections are complete.
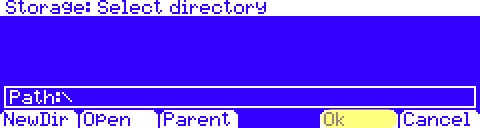
7) Choose a directory for your file: The PC3 storage system supports organizing your files into subdirectories if you wish. For this example we will simply save to the root directory (Path:\). Press [Ok]
8) Name your file: Using the alphanumeric keypad give your file a name. For the example here we left the default name “filename”. Press [OK] when finished.
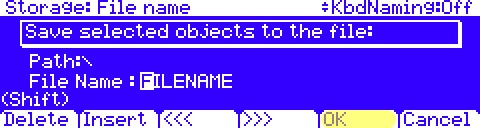
9) Press [Yes] if/when prompted to “Save Dependent Objects?”.

10) A message will briefly flash on screen indicating the file was created. You will then be brought back to the main Storage Mode screen. Done.