Legacy Model
Downloads and support materials maintained here as a courtesy to owners.

MP-20 OVERVIEW

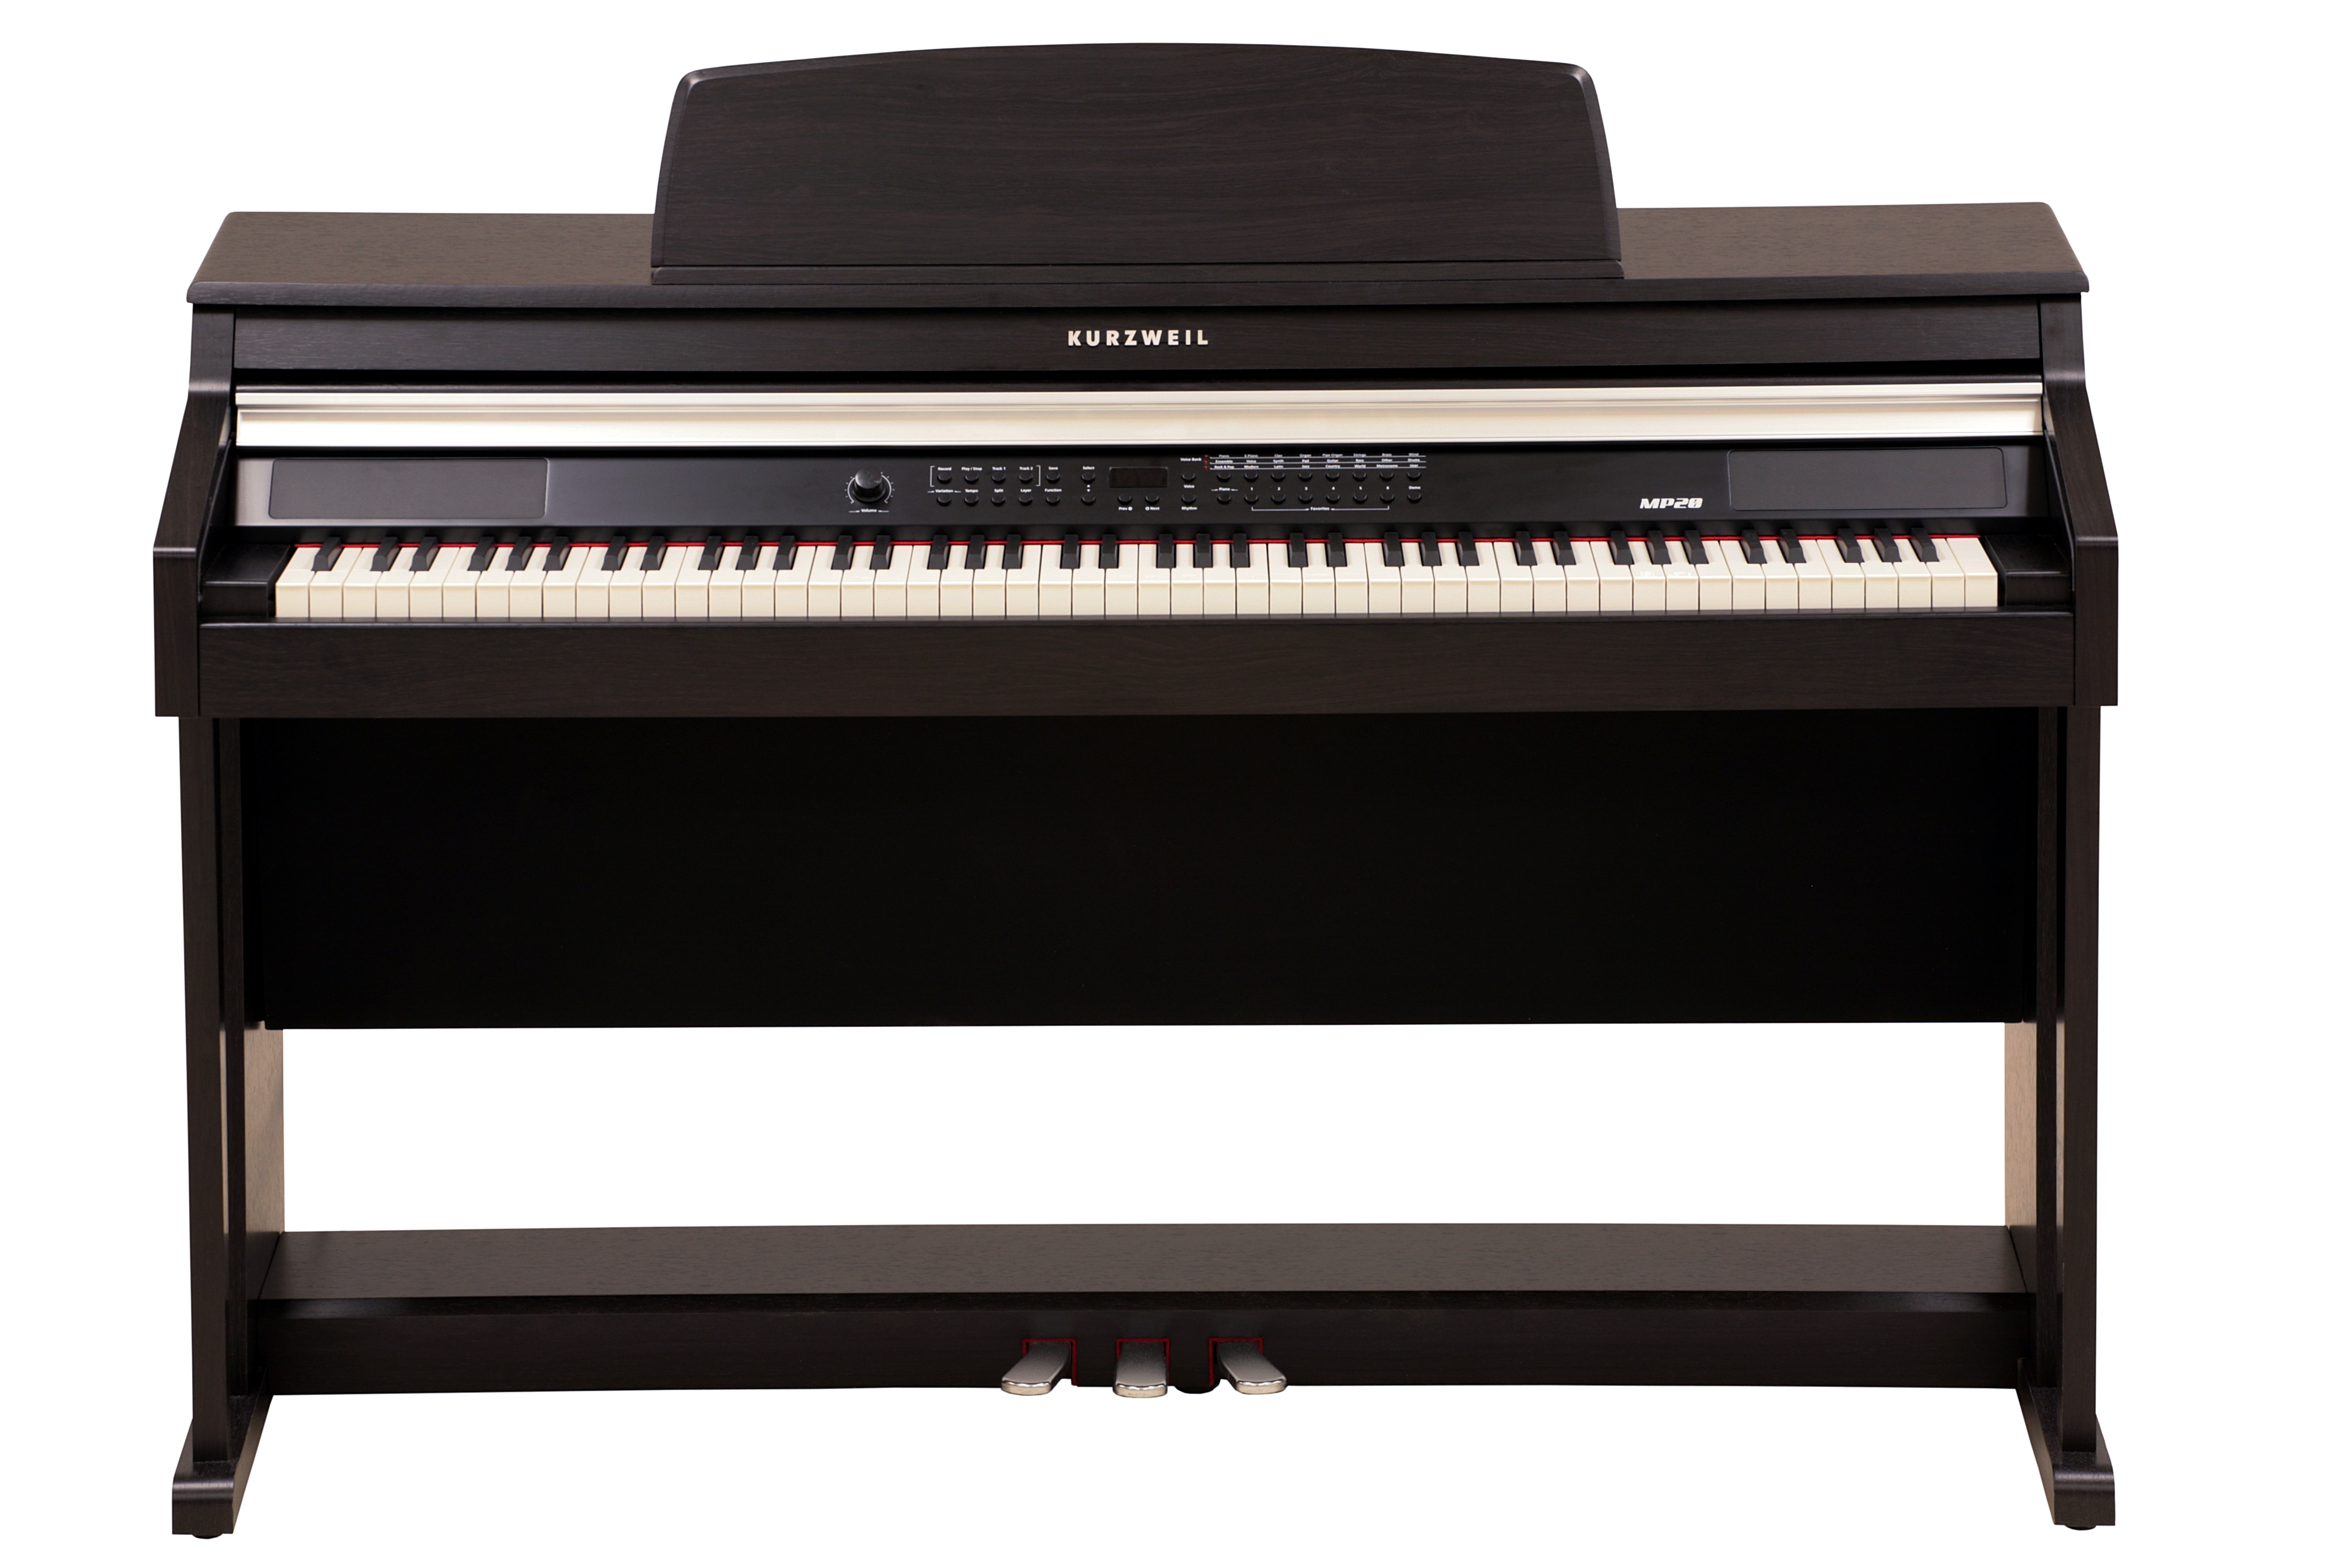
The MP20 digital piano combines value and affordability with 200 of the best sounds ever developed for KURZWEIL professional keyboards and sports features specifically engineered for sound, convenience, and control.

DESIGN

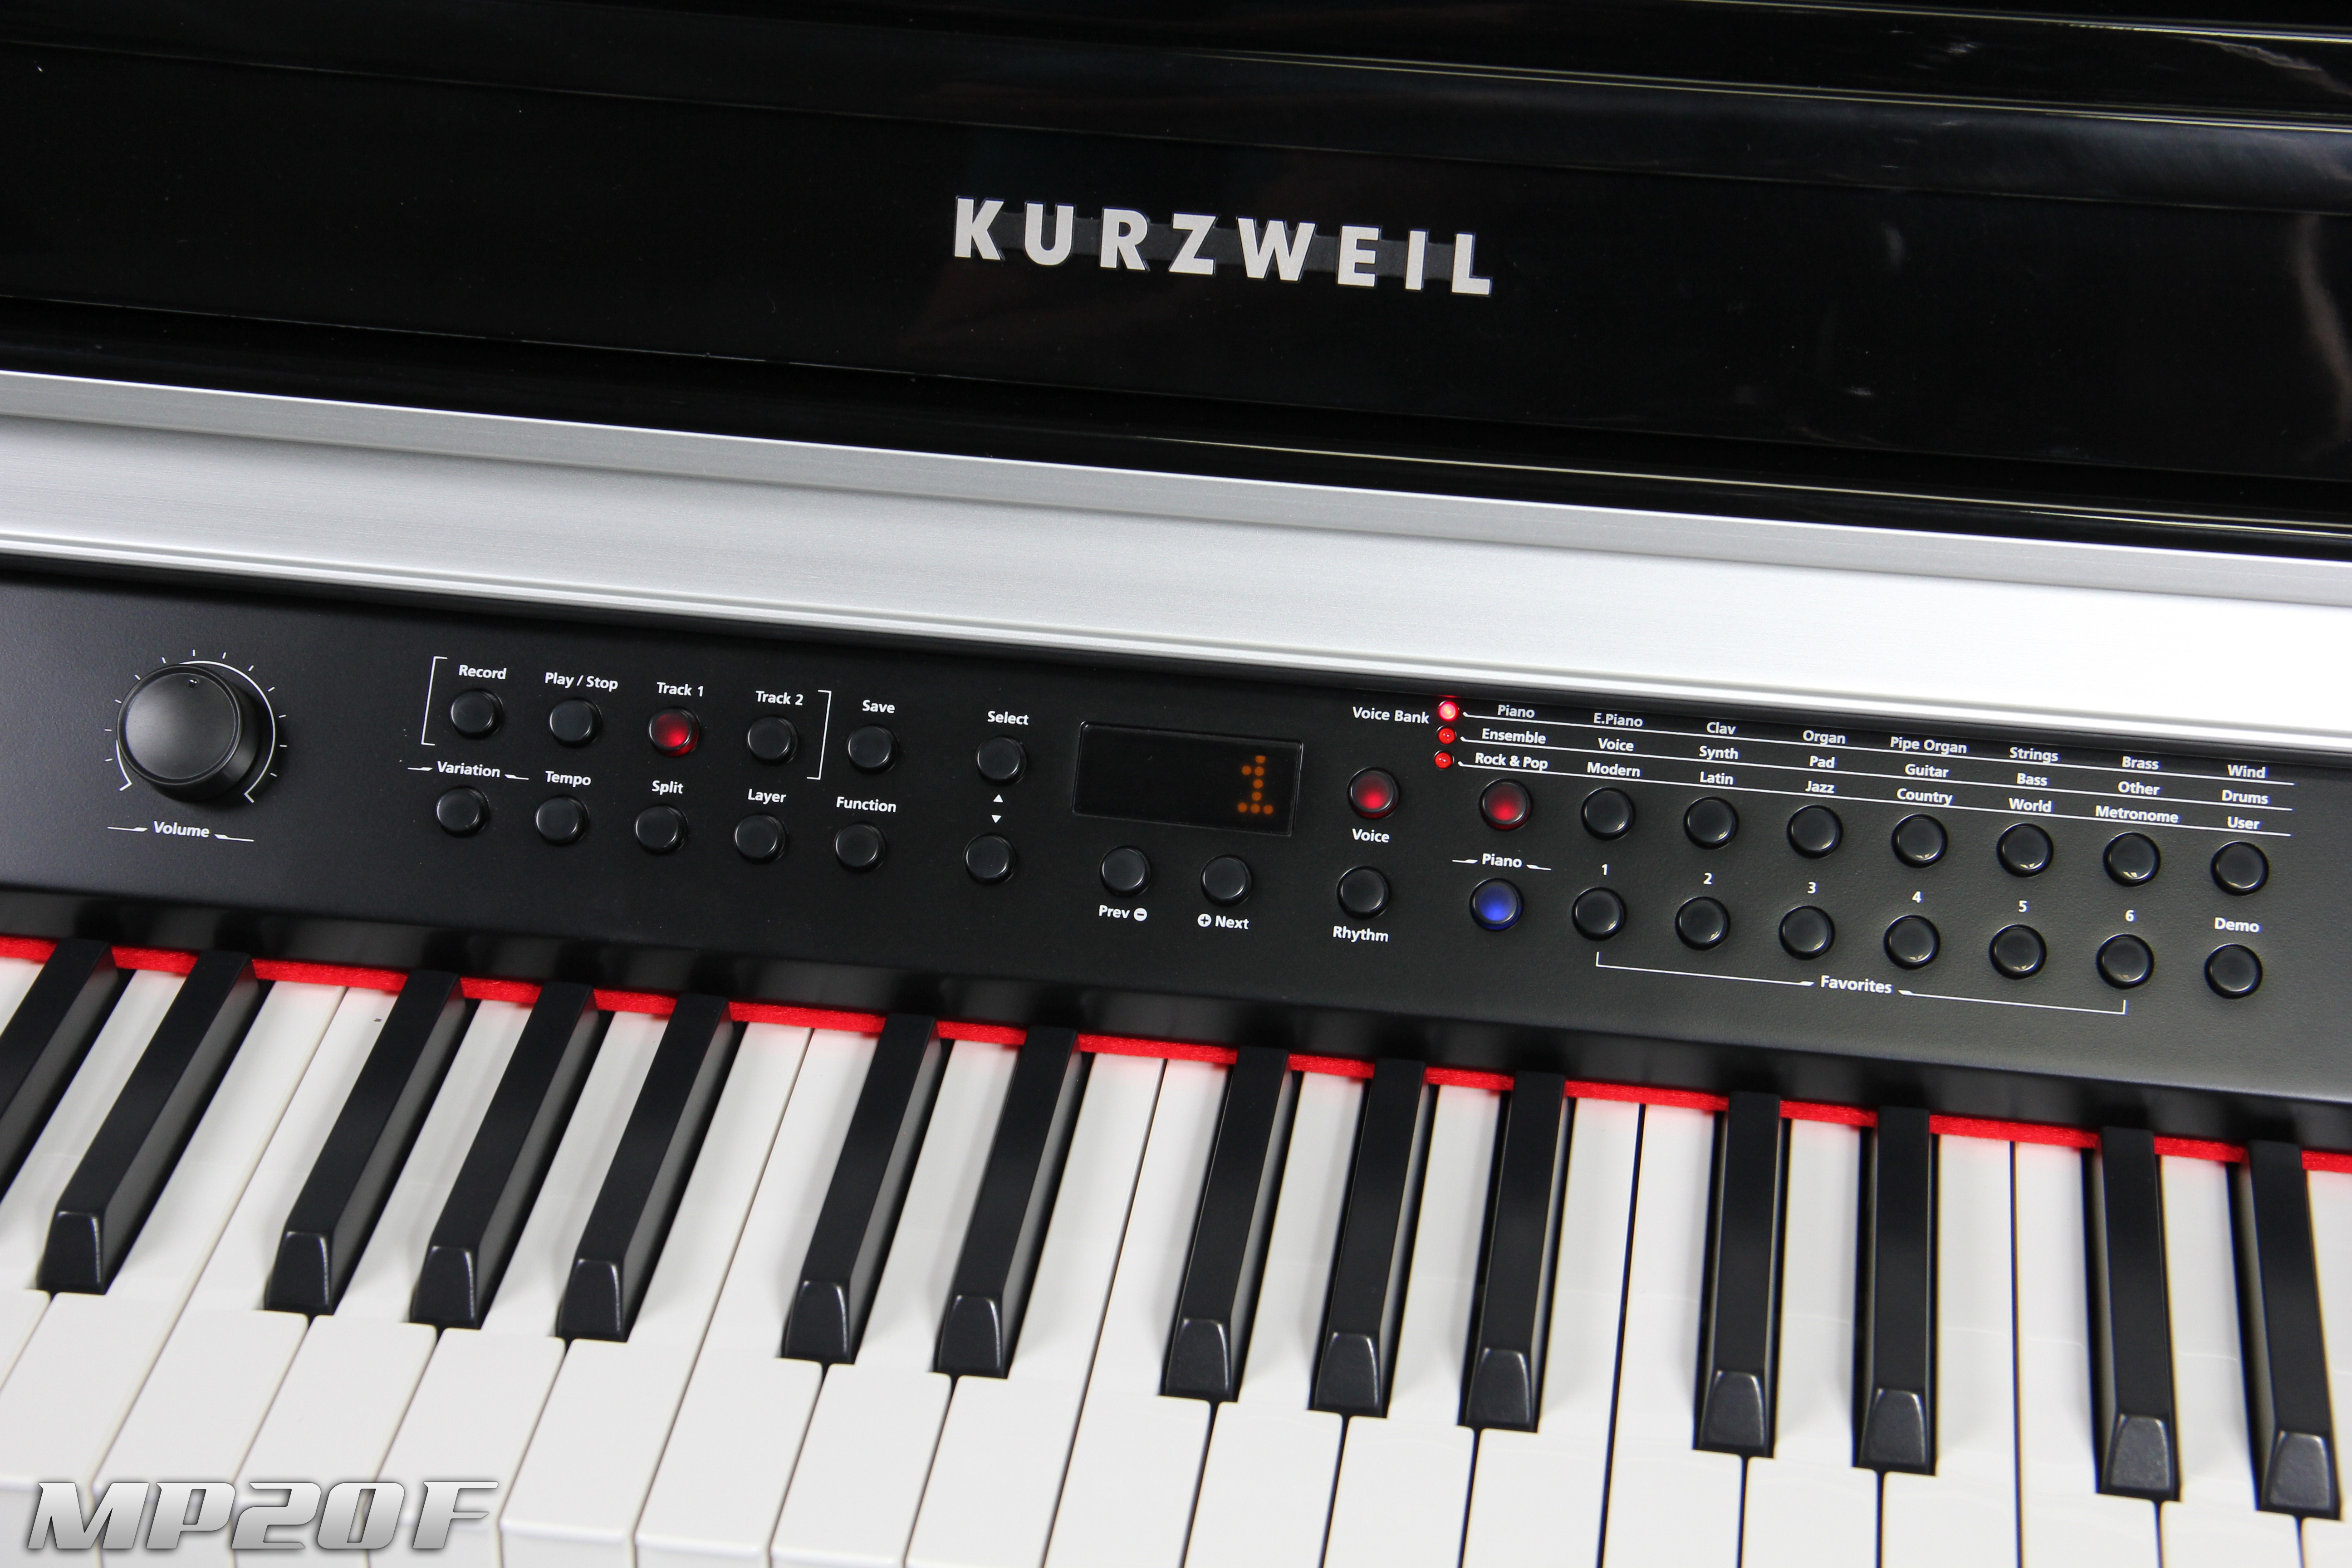
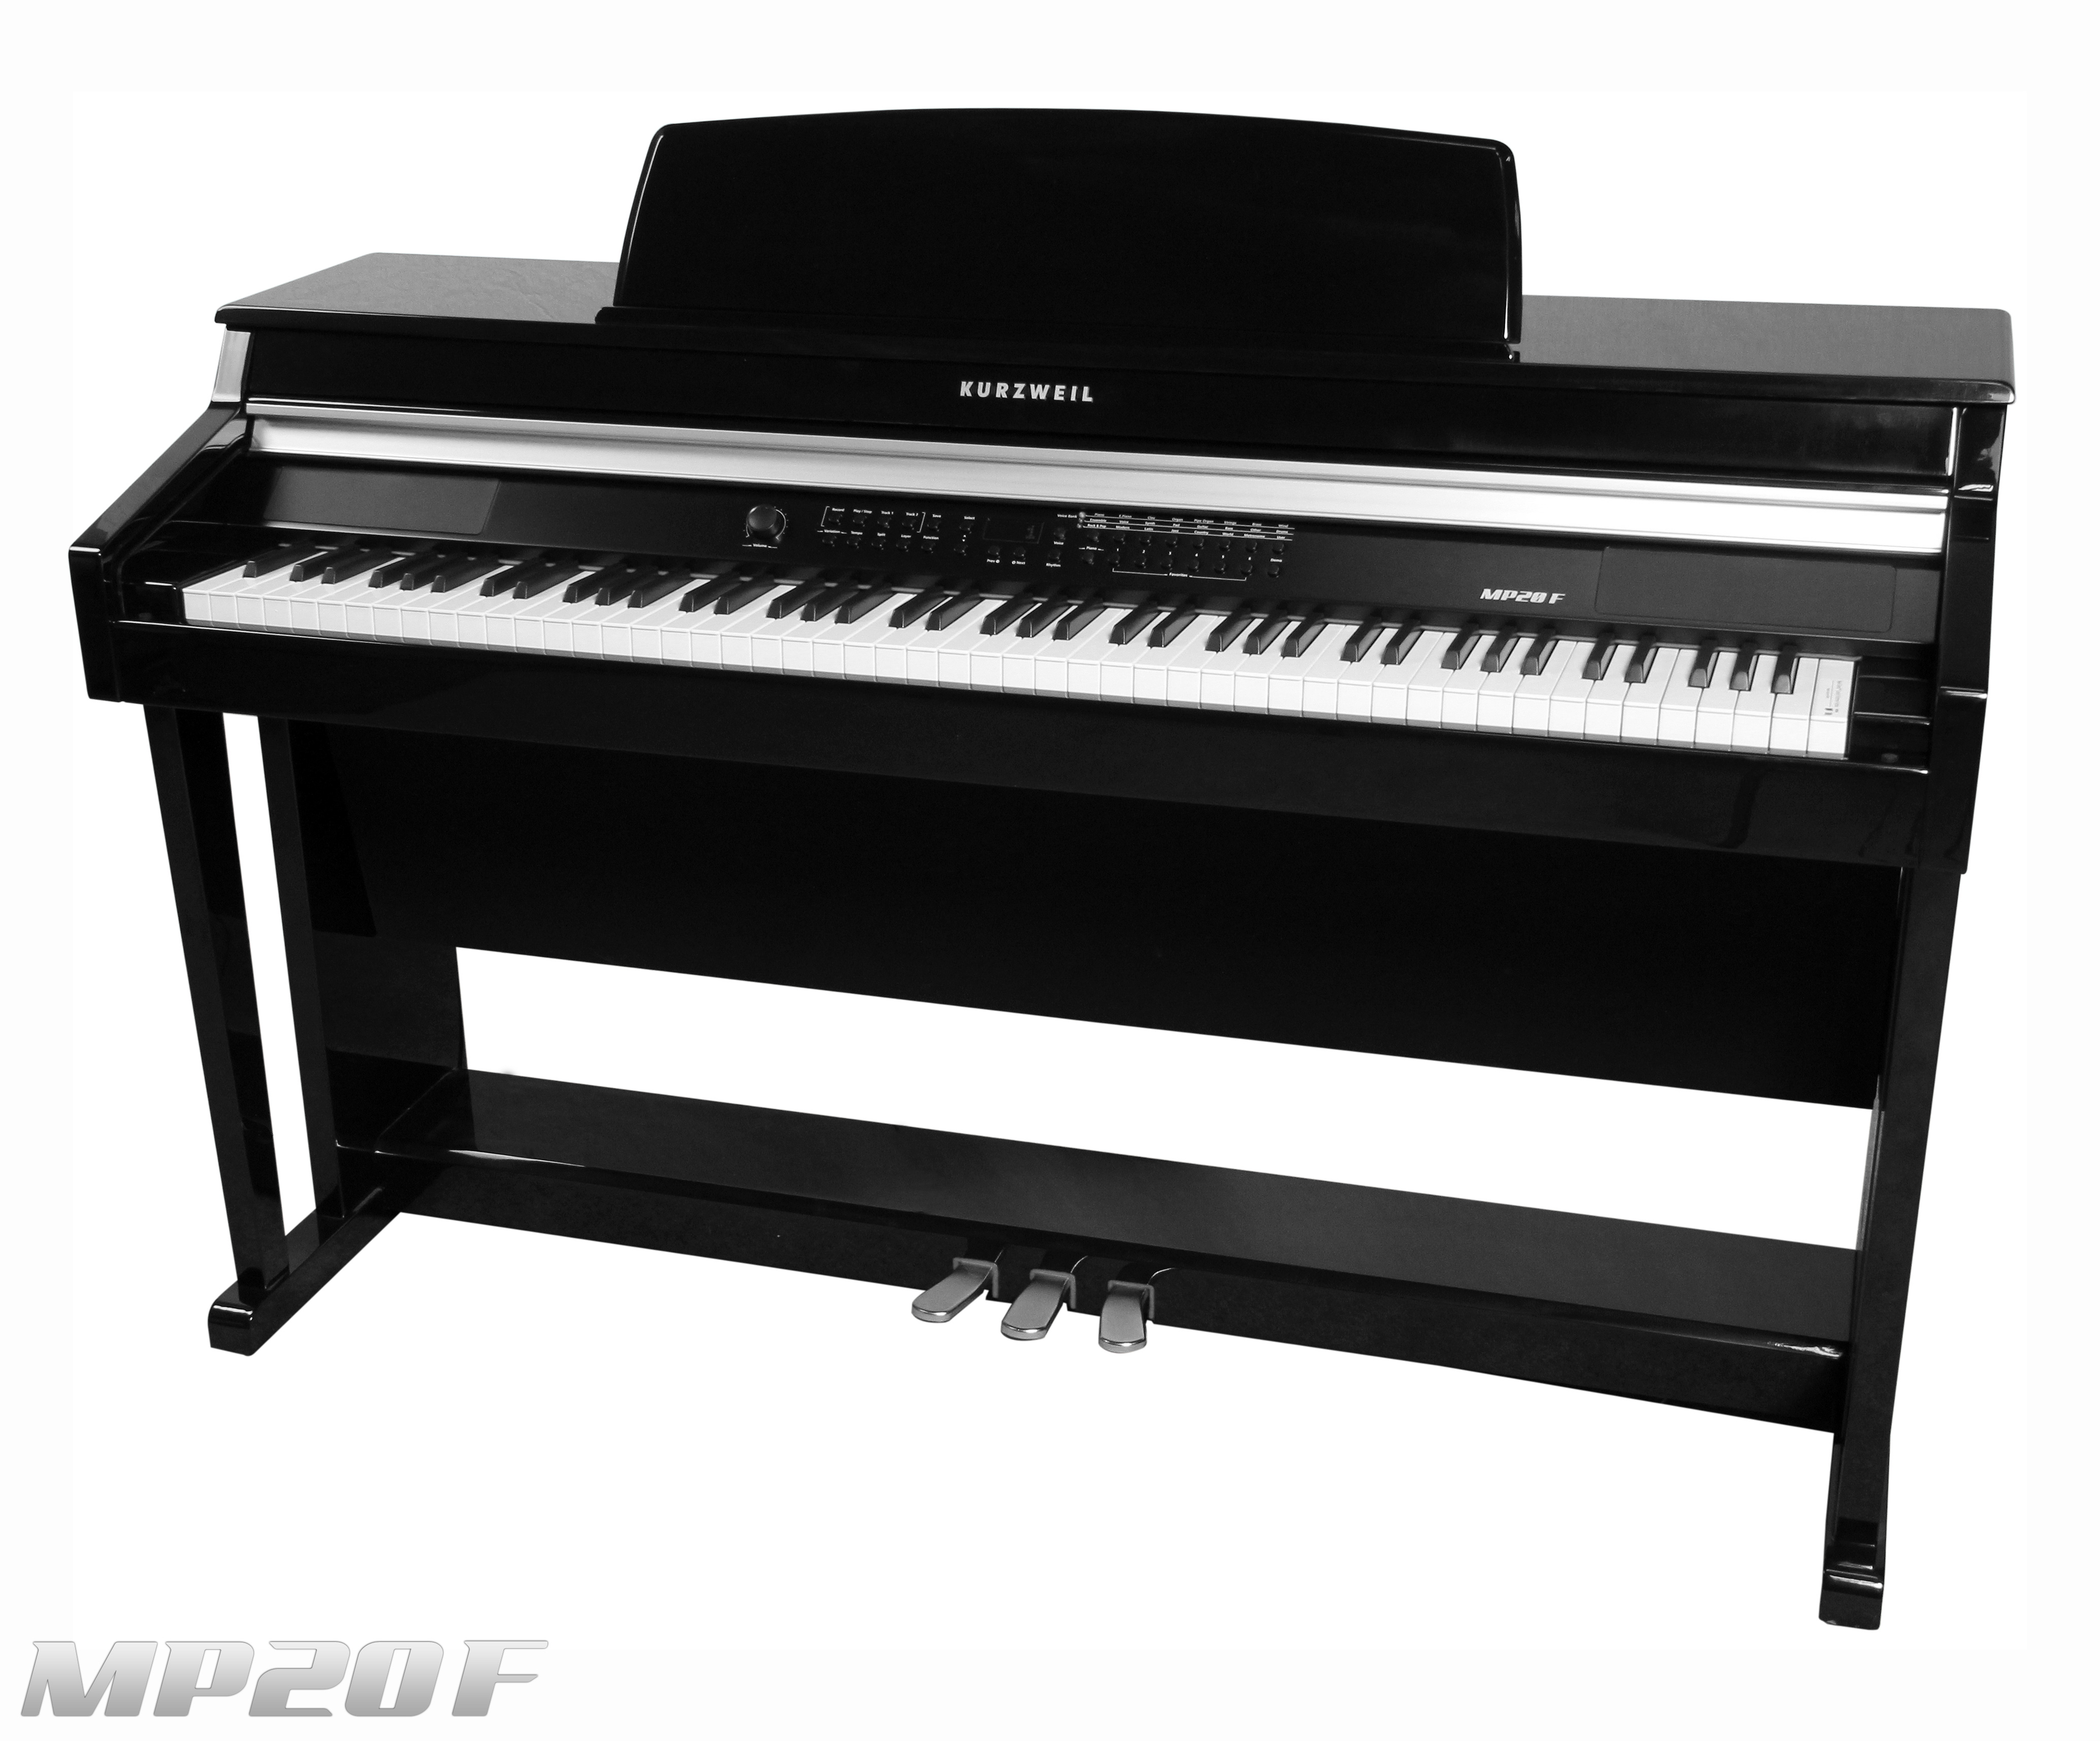
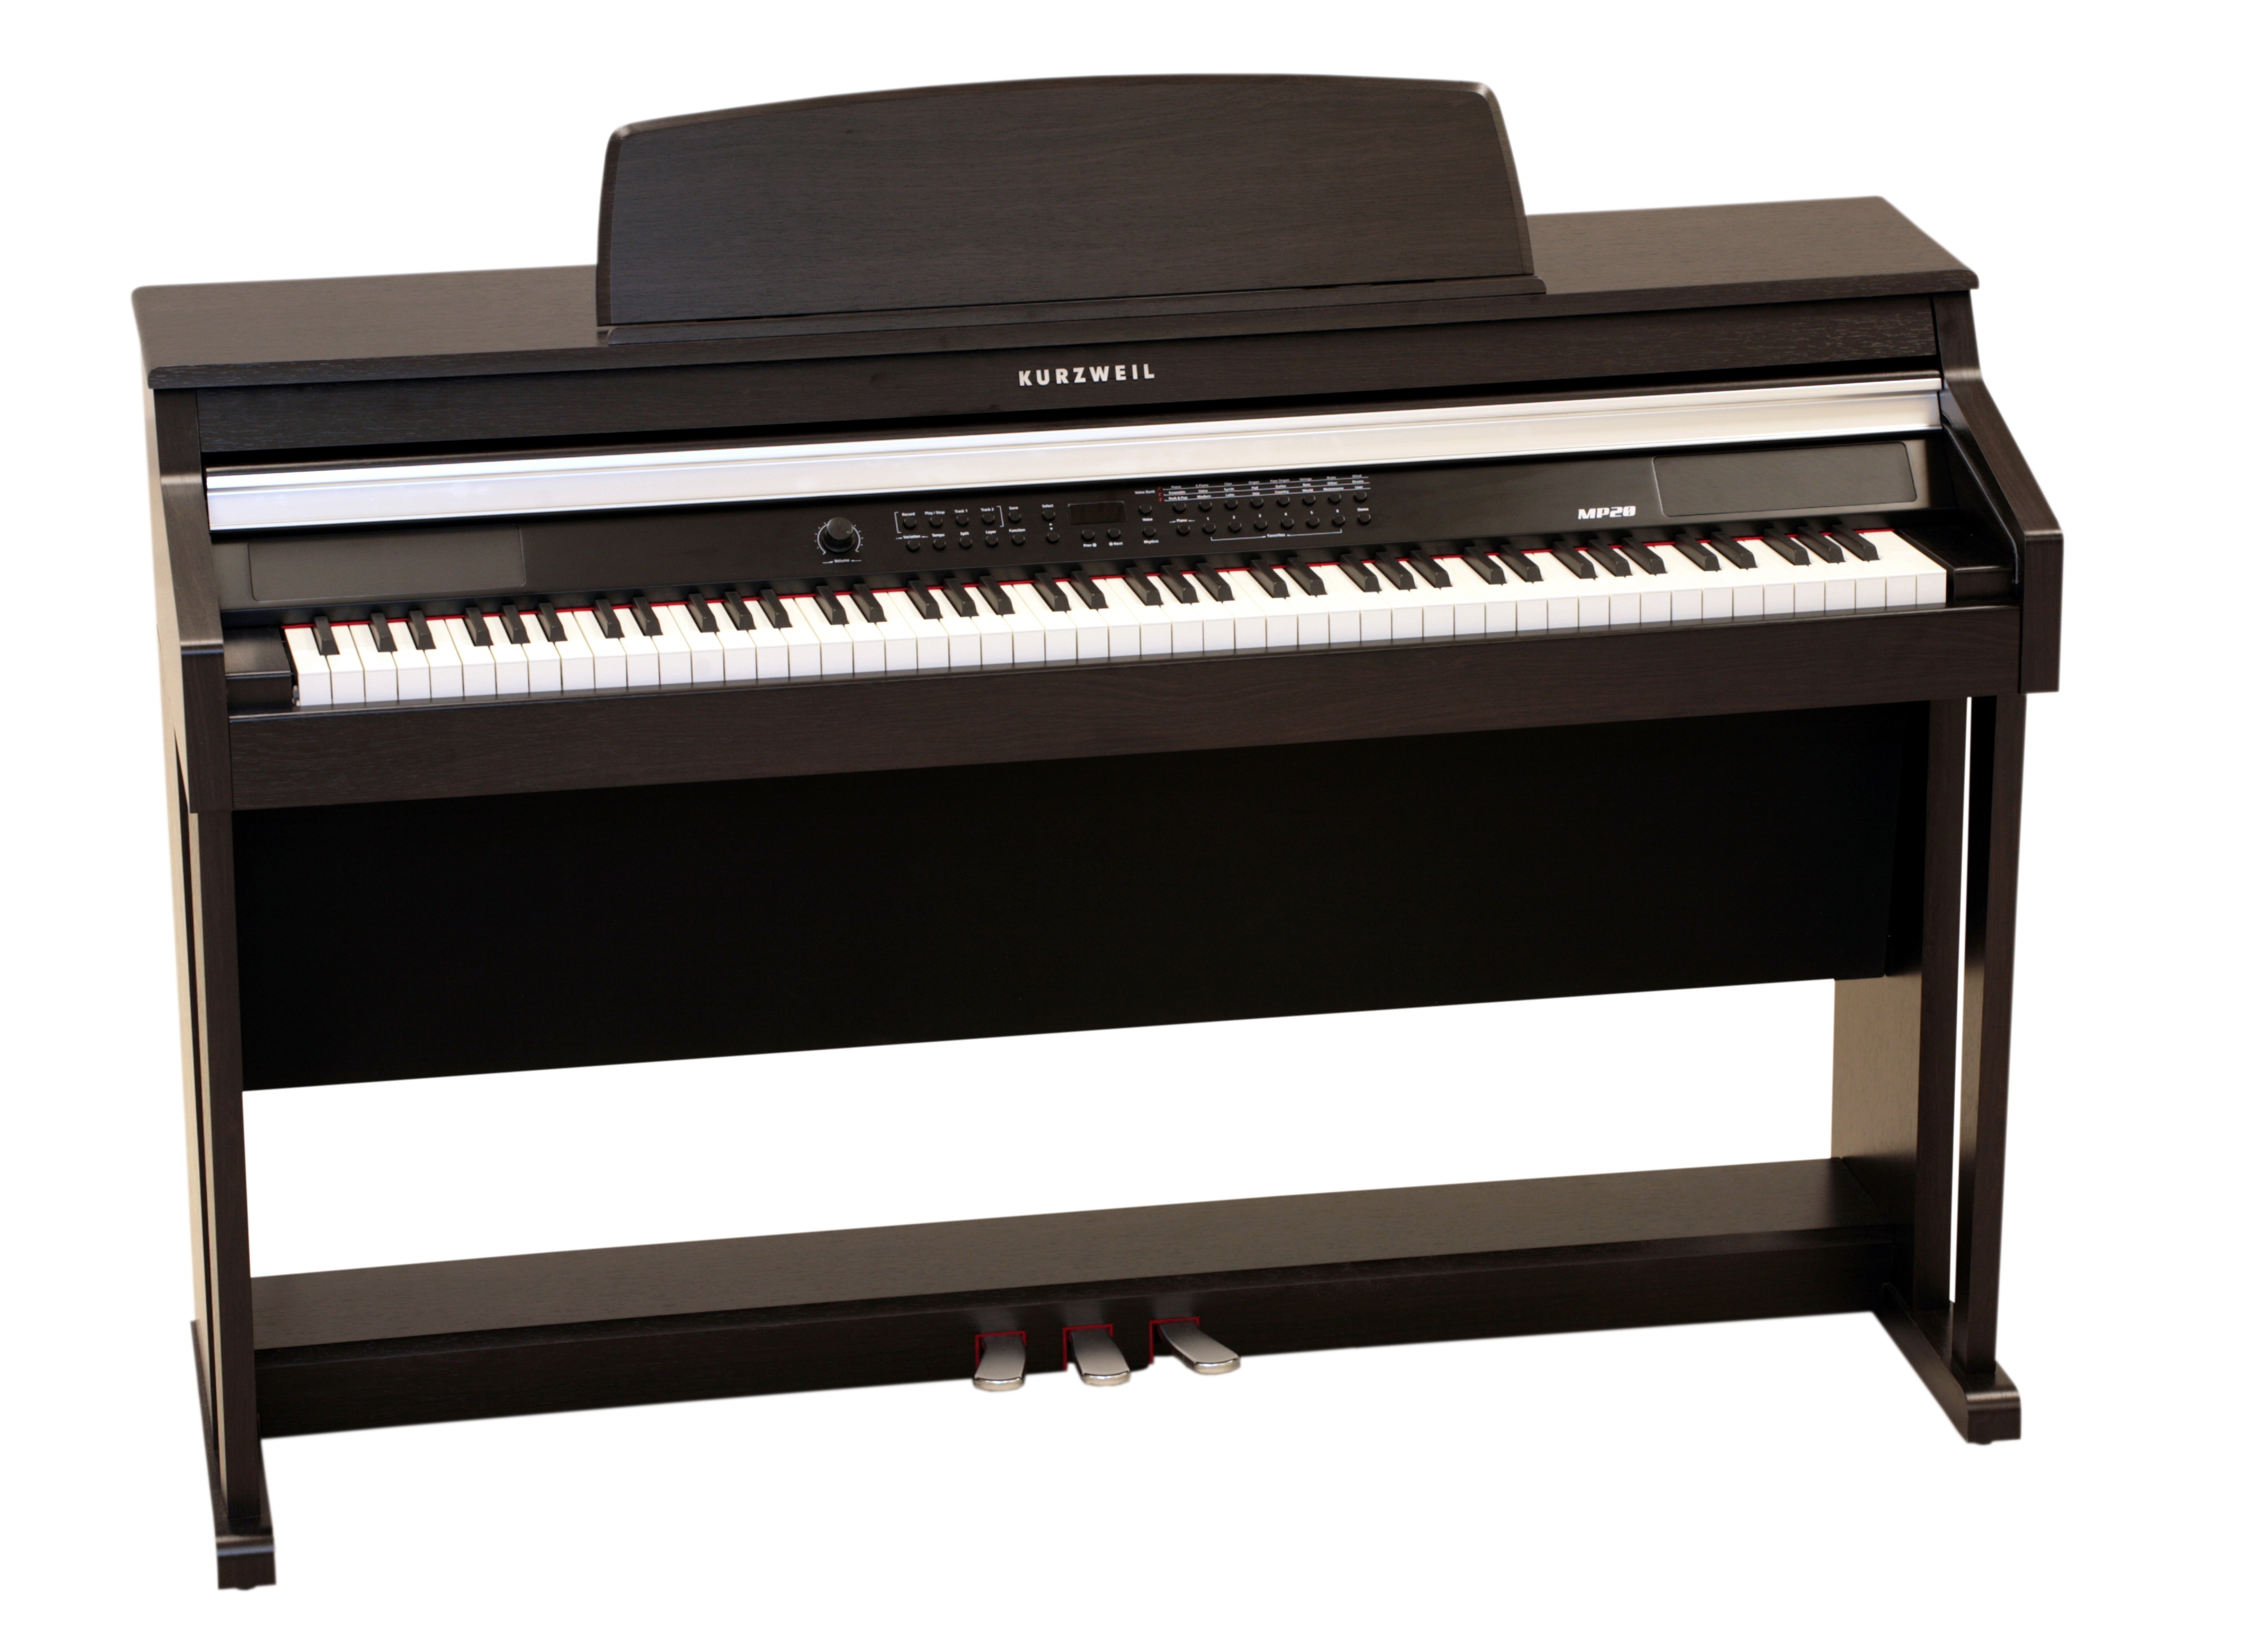
Fusing traditional spinet piano design and styling, the MP20 is available in two professional finishes: a fine Ebony Polish finish has a classic elegant look for more formal venues while the Satin Rosewood is at home in any room. The uniquely angled, tuned, ported-woofer enclosures provide deep bass and heightened sound dispersion to complement the instrument’s broad sound set. With tweeters placed directly behind the keys, a wide stereo soundfield is created, optimized for both player and audience. The MP20’s simple and intuitive control panel is angled for improved visibility/use and features an easy-slide key cover.

SOUND

The MP20 uses Kurzweil’s exclusive Mara sound chip and VAST architecture to create the most realistic and playable instrument sounds available. The digital signals are then realized through hand-matched amplifiers and speakers to produce a beautiful yet intimate sound field.

The MP20 sonic pallet features the famous KURZWEIL Triple Strike Grand Piano along with a diverse array of top notch and categorized instrument selections – electric pianos, organs, orchestral, drums, basses, horns, winds, guitars, percussion and more – are all available for creating entire musical productions in the comfort of your own home. (owner’s manual with preset list available for download here)

The MP20’s easy Split and Layering features offer yet another dimension of performance while it’s “Favorite” buttons provide instant recall of your most needed presets and custom combinations.

CONTROL

Great piano control starts with the keyboard action and the MP20 has one of KURZWEIL’s best proprietary hammer-action keyboards. Hammer motion, not key motion, is sensed to provide the most accurate dynamic control possible. The new MP20 keyboard grades the hammer weight through 4 gradual zones from light in the treble end to heavy in the bass end. The action also features an escapement which reproduces the let-off and jack engagement feel of a real acoustic piano.

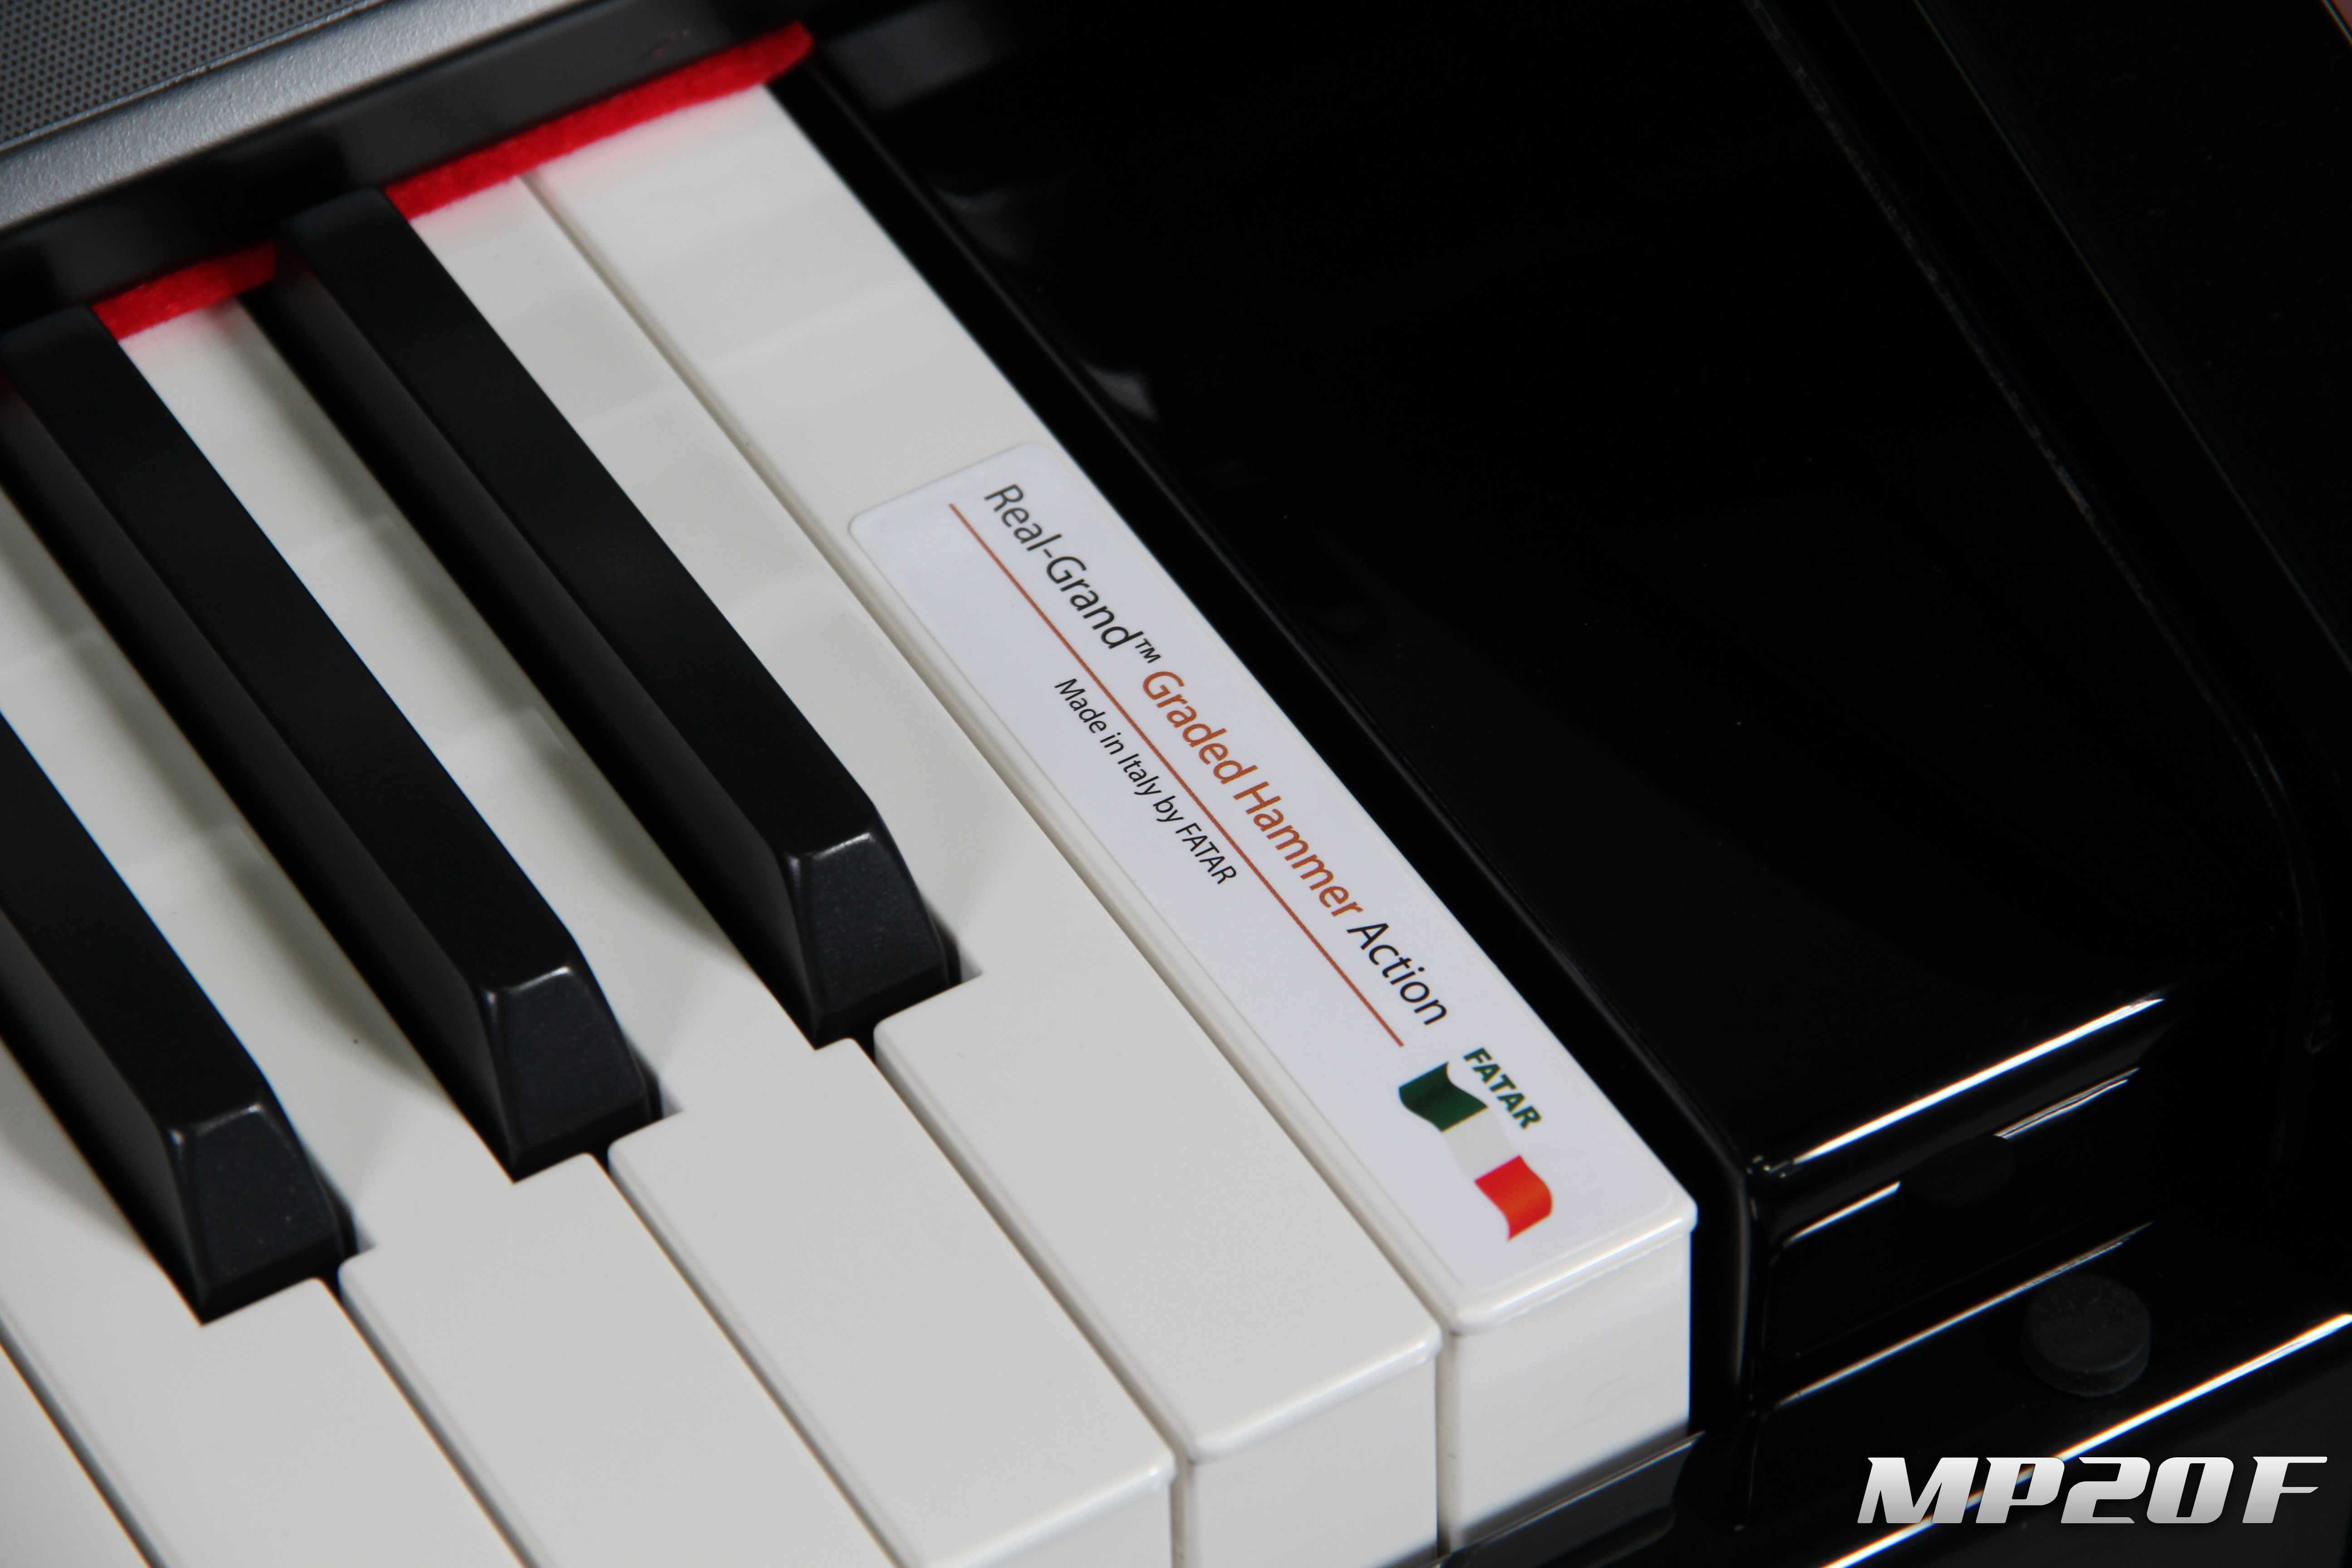
The MP20 is also offered as the MP20F, featuring an upgraded Real-Grand™ Hammer Action made by Fatar (Italy).

Complimenting the key-action, the MP20 features all 3 standard acoustic piano pedals built-in (sustain, sostenuto and soft) along with an optional Volume/Expression pedal input facilitating dynamic performances.

SPECS

Keyboard: 88-Note, Fully-Weighted, Graded Hammer-Action Keyboard with adjustable touch sensitive keys
MP20: LK-40 GH
MP20F: Fatar TP/40L GH
Keyboard Sensitivity: 10 selectable response levels
Display: Scrolling alphanumeric LED
Polyphony: 64 voice
Preset Programs: 200 Expressive sounds including award winning Triple Strike Grand Piano
User Presets: 6, one-touch recallable “favorites”, providing quick access to customized selections.
Demo Songs: 51 piano demos
General MIDI: No
Splits/Layers: Quick Split/Layer, easy access with adjustable relative volume
Transpose: Full transposition to any key, +/- two octaves
Tune: Adjust by Cents (+/- 100 cents)
Effects: Dual ambience and effect processors (reverberation and chorus). Rich and complex effects from the PC3 Series.
Drum Patterns: 100 pre-recorded interactive patterns in a variety of styles
Metronome: Yes
Recorder/Sequencer: 2-Track; 20 Song capacity
Sound System: 50-watt, 4-speaker stereo sound system
Audio Outs: Stereo left/right RCA line outs (for connecting to external amplification)
Audio Ins: Stereo left/right RCA line ins (for connecting external sound sources)
Headphones: (2) 1/4″ stereo headphone outs
MIDI I/O: MIDI In and Out connectors
USB: (1) port; “Plug and Play” USB functionality allows MIDI over USB for connecting to/from an external computer sequencer; no software driver needed
Pedals: (3) built-in switch-type: sustain, sostenuto, soft
(1) Continuous Controller Volume/Expression pedal input
Finish: Simulated Rosewood, Ebony Polish
Bench: Matching bench included
Dimensions: 34.5″(H) x 54.75″ (W) x 19.6″ (D)
87.6 cm (H) x 139.1 cm (W) x 49.8 cm (D)
Weight: 156 lb / 71 Kg
Power: 90-250V AC free voltage external power supply; 19V 3.42A DC

All specifications subject to change without notice.

IMAGES

VIDEOS

MP20 Digital Home Piano
An overview of the MP20 features

FAQs

Basic Concepts & User Interface

Question:
How can I delete tracks of a given song or erase a given song entirely on my MP20/MPS20?

Answer:

To Erase Individual Song Tracks:

  1. Select the User Song to work with:-Press the [Rhythm] button.-Press [User] category button.-Use the [+Next] and/or [Prev-] buttons to select: U1 – U20.
  2. Press the track button corresponding to which track you wish to erase – ex: [Track 1].
  3. Press [Record].
  4. Press [Play/Stop] to begin. Let the song run through its entire duration. Do not play on the piano keys.
  5. Press [Play/Stop] when the song end is reached.
  6. Press [Save] to store.

Note: This method only permits deleting Track 1 and/or Track 2. It does NOT permit deleting any Rhythm used in recording.


To Erase a User Song Completely (including Rhythm):

    1. Press the [Rhythm] button.
    2. Using the [+Next] and/or [Prev-] buttons, select #351 “No Rhythm”. Rhythm #351 is a ‘blank’.
      (usually
      moving backwards through the list pressing [Prev -] several times, will get you there quickest).
    3. With rhythm #351 selected, press [Record].
    4. Press [Play/Stop] (you can press [Play/Stop] anytime after the start).

You will be prompted to “SAVE RHYTHM AS UX?” – where “X” equals the User Song number (1-20).

  1. Using the [+Next] and/or [Prev-] buttons, select the User song to erase, for ex “U1”.
  2. Press [Save] and the chosen User Song (U1 in our ex) will be erased completely.

Question:
How do I enable a practice metronome in my MP20/MPS20?

Answer:

To enable a metronome click to practice along with:

  1. Press the [Rhythm] button.
  2. Using the [+Next] and/or [Prev-] buttons to select one of the 5 available on-board metronome patterns (ID #301-305). For ex: #305 is a simple 1/4 note metronome (see the list of “Rhythm Patterns” on pg. 43 in the manual for details).
  3. To set the tempo, press the [Tempo] button, then, using the [+Next] and/or [Prev-] buttons, select your desired tempo (range= 20~300 bpm).
  4. Press [Play/Stop] to start the metronome.
  5. Press [Play/Stop] again to stop the metronome.

Usage Details

    • Adjust the Metronome Volume:-Press the [Rhythm] button.-Press the [Select] buttons to choose the “VOL:X” parameter (range= 1~9).-Using the [+Next] and/or [Prev-] buttons to select the volume level.


  • Save Metronome as a Favorite:-Press & hold one of the six [Favorite] buttons for 2 sec. to store the current rhythm/metronome pattern and voice selection to that selected location.-The selection can be recalled at any time by pressing the same [Favorite] button again.

Product Comparisons

Question:
What are the primary feature comparisons between our current Home Digital Pianos?

Answer:

Download the Kurzweil Home Digital Piano Model Comparison Chart here
(.pdf format).

Rhythm Mode

Question:
How do I enable a practice metronome in my MP20/MPS20?

Answer:

To enable a metronome click to practice along with:

  1. Press the [Rhythm] button.
  2. Using the [+Next] and/or [Prev-] buttons to select one of the 5 available on-board metronome patterns (ID #301-305). For ex: #305 is a simple 1/4 note metronome (see the list of “Rhythm Patterns” on pg. 43 in the manual for details).
  3. To set the tempo, press the [Tempo] button, then, using the [+Next] and/or [Prev-] buttons, select your desired tempo (range= 20~300 bpm).
  4. Press [Play/Stop] to start the metronome.
  5. Press [Play/Stop] again to stop the metronome.

Usage Details

    • Adjust the Metronome Volume:-Press the [Rhythm] button.-Press the [Select] buttons to choose the “VOL:X” parameter (range= 1~9).-Using the [+Next] and/or [Prev-] buttons to select the volume level.


  • Save Metronome as a Favorite:-Press & hold one of the six [Favorite] buttons for 2 sec. to store the current rhythm/metronome pattern and voice selection to that selected location.-The selection can be recalled at any time by pressing the same [Favorite] button again.

Song Recorder

Question:
How can I delete tracks of a given song or erase a given song entirely on my MP20/MPS20?

Answer:

To Erase Individual Song Tracks:

  1. Select the User Song to work with:-Press the [Rhythm] button.-Press [User] category button.-Use the [+Next] and/or [Prev-] buttons to select: U1 – U20.
  2. Press the track button corresponding to which track you wish to erase – ex: [Track 1].
  3. Press [Record].
  4. Press [Play/Stop] to begin. Let the song run through its entire duration. Do not play on the piano keys.
  5. Press [Play/Stop] when the song end is reached.
  6. Press [Save] to store.

Note: This method only permits deleting Track 1 and/or Track 2. It does NOT permit deleting any Rhythm used in recording.


To Erase a User Song Completely (including Rhythm):

    1. Press the [Rhythm] button.
    2. Using the [+Next] and/or [Prev-] buttons, select #351 “No Rhythm”. Rhythm #351 is a ‘blank’.
      (usually
      moving backwards through the list pressing [Prev -] several times, will get you there quickest).
    3. With rhythm #351 selected, press [Record].
    4. Press [Play/Stop] (you can press [Play/Stop] anytime after the start).

You will be prompted to “SAVE RHYTHM AS UX?” – where “X” equals the User Song number (1-20).

  1. Using the [+Next] and/or [Prev-] buttons, select the User song to erase, for ex “U1”.
  2. Press [Save] and the chosen User Song (U1 in our ex) will be erased completely.

Question:
What are the steps to record using splits/layers?

Answer:

Recording Track 1

    1. Select the voice you want to use for Track 1. If you’ve saved a split or layered sound to Favorites, you can choose one of those.
    2. If you’ve enabled Rhythms for recording (see below under ‘Usage Notes’), press the Rhythm button and select a pattern for your recording.
    3. Press [Track 1]
    4. Press [Record]

If you are using the metronome, it will count off one measure before recording begins (see below under ‘Usage Notes’).

    1. Press [Play/Stop] to begin the recording.
    2. Perform the song now.
    3. Press [Play/Stop] to stop the recording.

The Save button’s LED starts flashing and the display shows SAVE RHYTHM AS:(U1 – U20). These represent the user song locations. There are 20 available.

  1. Press the [+Next] button to select the User Song number (U1 – U20) to save to.
  2. Press the [Save] button. Your song is now saved in the above selected user songs location.

Recording Track 2

    1. Select the voice you want to use for Track 2. If you’ve saved a split or layered sound to Favorites, you can choose one of those.
    2. Select the desired User Song to record to:-Press the [Rhythm] button.-Press the [User] button (the button on the upper right hand side on the far end, above “Demo”)-Press [Prev-] or [Next+] to navigate to the desired song (U1 through U20).
    3. Press [Track 2]
    4. Press [Record]. The display shows the RECORD READY message.
    5. Press [Play/Stop] to begin the recording.
    6. Perform the second track of your song now. Track 1 will be playing while you are recording Track 2.
    7. Press [Play/Stop] to stop recording.

Similar to before, the Save button’s LED starts flashing and the display shows SAVE RHYTHM AS:(U1 – U20). You can now save your song to the same User Song location, or choose a new location if desired.

  1. As needed, press the [+Next] button to select the User Song number (U1 – U20) to save to.
  2. Press the [Save] button. Your song is now saved in the above selected user songs location.

USAGE NOTES

Enabling Rhythms while Recording

  1. Press the [Function] button to enter Function Mode.
  2. Press the [Select] ▲ and ▼ button to step through the list of parameters to locate REC RHYTHM.
  3. Press the [Prev-] or [+Next] button to change the value to ON
    (the default setting for the REC RHYTHM parameter is OFF – when set OFF no backing rhythm will be triggered).
  4. Press the [Function] button again to exit Function Mode.

Using the Metronome while Recording

  1. Press the [Function] button to enter Function Mode.
  2. Press the [Select] ▲ and ▼ button to step through the list of parameters to locate METRO.
  3. Press the [Prev-] or [+Next] button to change the value to REC (heard only during recording) or ON (heard during recording and playback).
    (the default setting for the METRO parameter is OFF – when set OFF no metronome will be triggered).
  4. Press the [Function] button again to exit Function Mode.

Troubleshooting

Question:
How can I restore my MP20/MPS20 to its factory defaults?

Answer:

Note: Performing a Hard Reset will delete all user-recorded songs and will restore all parameters to default values. This action cannot be undone.

There are two methods:

Power Up Method:

  1. Hold the C8 key down while switching on the power.
  2. Continue to hold C8 down until you see “RESETTING” (scrolling) in the display then release.

Function Menu Method:

  1. Press the Function button.
  2. Press either Select [Up] or [Down] buttons to move through the function menu (forwards and backwards) and locate the Hard Reset parameter:The display will show (scrolling): “Hard Reset?”
  3. Press [Next+].The display will show (scrolling): “Confirm?”
  4. Press [Next+] again to perform the reset.

Via either method, the unit will then erase its user memory, restore all factory settings and reboot.

Question:
I am having difficulties getting my Windows PC running Vista/Win7/8 to output MIDI to my Kurzweil via USB. Do I need to install a driver?

Answer:

No. The current line of Kurzweil products have a standard class-compliant USB-MIDI implementation. They do not require the installation of any additional drivers.

Some background to be aware of:

Microsoft has been steadily REMOVING MIDI FEATURES from Windows since Vista. In Windows XP, Microsoft provided a MIDI Mapper control panel which allowed end users to select a MIDI output device. Since Vista this has not been available. As such, certain apps (like Windows Media Player – WMP) can no longer play MIDI songs triggering external MIDI devices because WMP is only routed to the internal Microsoft GS Synthesizer.

This means the MIDI app you choose to use must natively offer its own built-in MIDI mapping abilities OR you could possibly install a 3rd party MIDI mapper whose purpose is to replace the MIDI routing abilities removed from Windows. Fortunately,
these days, most commercial MIDI software products for PC, such as Cubase or Cakewalk, have a configuration screen which includes the MIDI device mapping necessary to route to an external MIDI device.

DOWNLOADS

User Manuals

MP-20 User’s Manual (English) – 3.8 MB
Owner’s Manual – English (.pdf)
2012-06-27

MP-20 User’s Manual (Korean) – 8.5 MB
Owner’s Manual – Korean (.pdf)
2018-08-21

OS Updates

MP-20 v2.26 Update – 2.8 MB
.KUF file (O/S, Objects, Boot Loader);
Read Me (installation instructions and revision history)
2014-02-11

SUPPORT

Contact Pre-Sales

Do you have questions you need answered before you buy?

Product Registration

Register your new product with your local distributor.

Contact Distributor Support

Do you have questions about the use or application of your Kurzweil product?

Contact Service/Repair

Needing repair? Need to locate a local authorized service center? obtain parts?

Authorized Repair Facilities

Locate a Kurzweil repair facility near you.