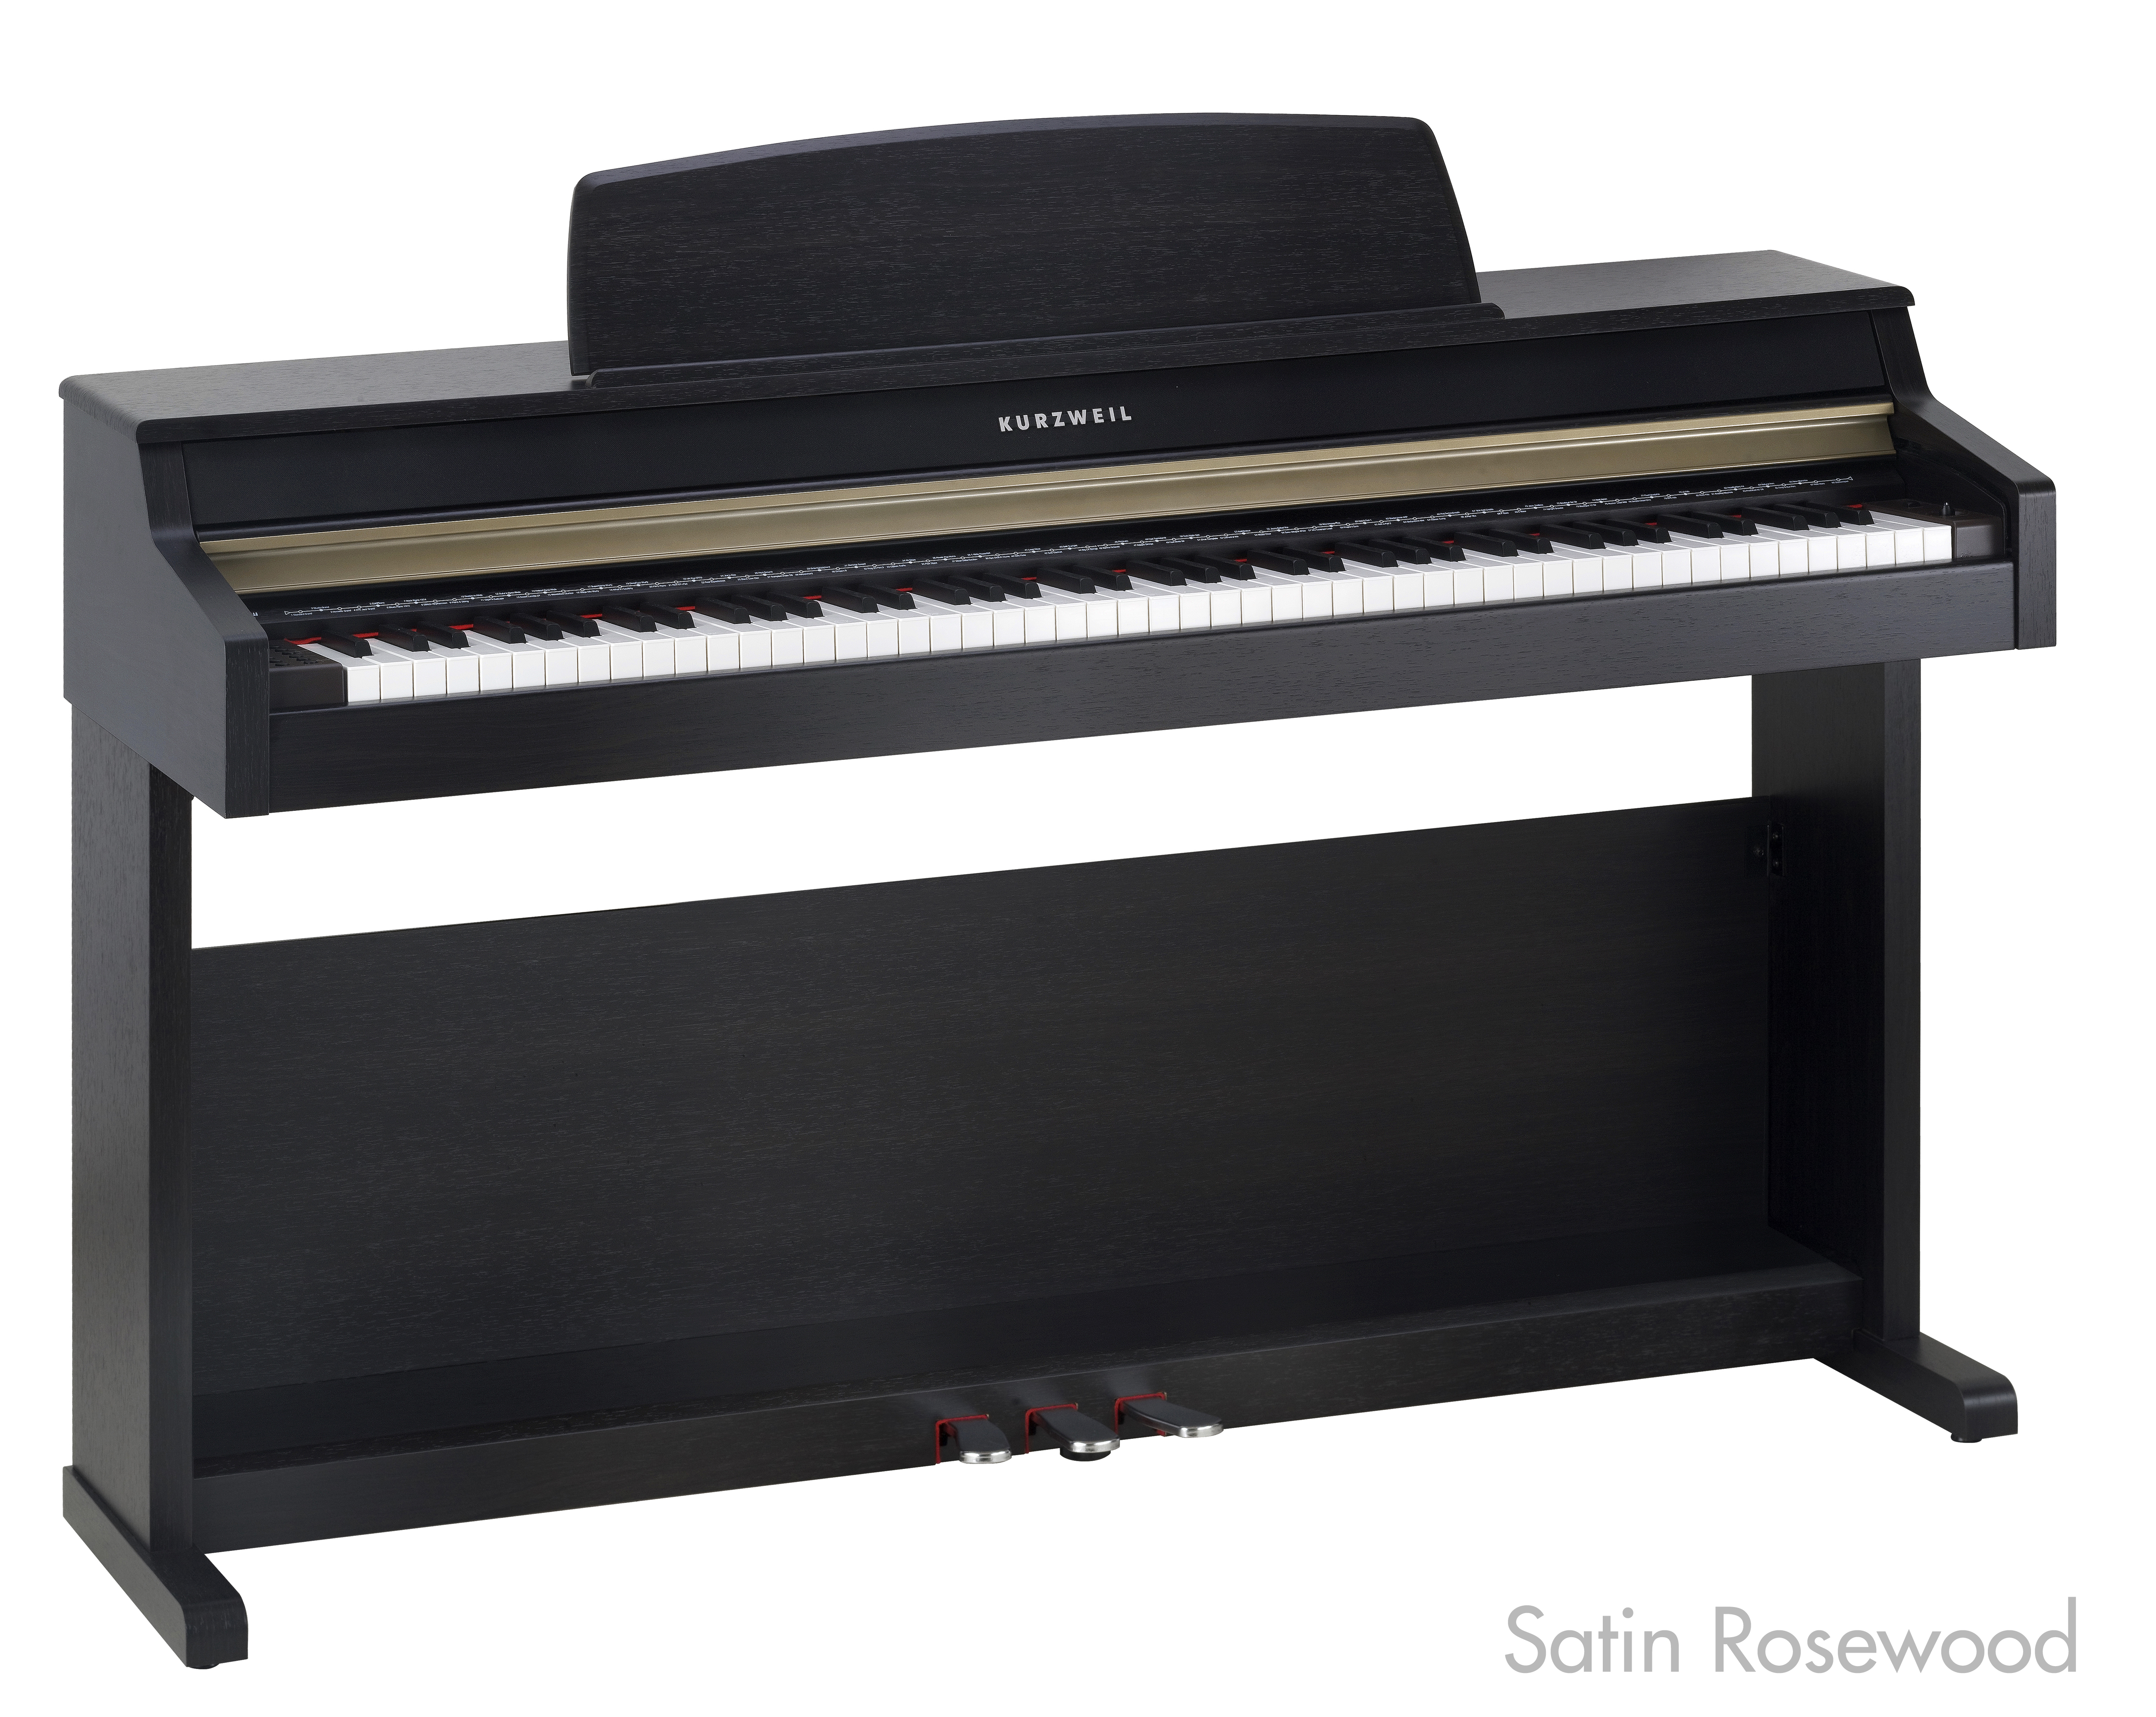
Legacy Model
Downloads and support materials maintained here as a courtesy to owners.

MP-10 OVERVIEW

The MP-10 combines value and affordability with the best sounds ever developed for Kurzweil Pro keyboards. The MP-10 uses the same chips as our PC3 Series keyboards and features 88 onboard sounds taken directly from the PC3 (Sound Program List available for download here).

The famous Kurzweil Triple Strike Grand Piano is included, as well as top notch electric pianos, orchestral and acoustic instruments, and everything else you would need to create an entire musical production in the comfort of your own home – drums, basses, horns, winds, guitars and percussion.

Like the other MP Series pianos, the MP-10, with its elegant compact spinet cabinet, will compliment any decor, from traditional to modern and promises to fill your home with the joy of music.

The MP10 is also offered as the MP10F, featuring an upgraded Real-Grand™ Hammer Action made by Fatar (Italy).

Available in Satin Rosewood, Ebony Polish & Simulated Dark Rosewood finishes.

SPECS

Keyboard: 88 Note fully weighted action with adjustable touch sensitive keys
MP10: LK-40H
MP10F: Fatar TP/40L
Keyboard Sensitivity: 10 selectable response levels
Display: Scrolling alphanumeric LED
Polyphony: 64 voice
Preset Programs: 88 Expressive sounds including award winning Triple Strike Grand Piano, all taken from the PC3
User Presets: 3, one-touch recallable “favorites”, providing quick access to customized selections
Demo Songs: 51 piano demos
General MIDI: No
Splits/Layers: Quick Split/Layer, easy access with adjustable relative volume
Transpose: Full transposition to any key, +/- two octaves
Tune: Adjust by Cents (+/- 100 cents)
Effects: Dual ambience and effect processors (reverberation and chorus). Rich and complex effects from the PC3 Series.
Drum Patterns: 78 pre-recorded interactive patterns in a variety of styles
Metronome: Yes
Recorder/Sequencer: 1-Track; 9 Song capacity
Sound System: 30-watt 2-way 4-speaker stereo sound system
Audio Outs: Stereo left/right RCA line outs (for connecting to external amplification)
Audio Ins: Stereo left/right RCA line ins (for connecting external sound sources)
Headphones: (2) 1/4″ stereo headphone outs
MIDI I/O: MIDI In and Out connectors
USB: (1) port; “Plug and Play” USB functionality allows MIDI over USB for connecting to/from an external computer sequencer; no software driver needed
Pedals: (3) built-in switch-type: sustain, sostenuto, soft
Finishes: Satin Rosewood / Ebony Polish
Bench: Matching bench included
Dimensions: 34.65″(H) x 56″ (W) x 18.5″ (D)
88 cm (H) x 142 cm (W) x 47 cm (D)
Weight: 114.5 lb / 52 Kg
Power: 15 VDC, 2.5A, 100-240VAC external power adaptor (incl.)

All specifications subject to change without notice.

IMAGES

AUDIO


 Bass


Choir & Vocal


Clav


E. Piano


Guitar


Orchestral


Percussion


Piano


Synth


VIDEOS

MP10 Digital Home Piano
An overview of the MP10 features

FAQs

Basic Concepts & User Interface

Question:
Where can I obtain a list of the factory preset Programs for the MP-10?

Answer:

Under the DOWNLOADS Tab on the MP-10 Product page (under ‘User Manuals’) you will find a link titled “CUP-2/MP-10 Program List”. The download contains both .pdf and .xls files listing all system objects (programs, setups, effects, etc).

Question:
How can I adjust the touch sensitivity of my CUP2/MP10/MPS10?

Answer:

To adjust the Touch Sensitivity (how the keyboard responds to your playing):

    1. Press [Layer] + [Split] together to enter the FUNCTION menu.


    1. Press either [Layer] -OR- [Split] to move through the Function menu (forwards and backwards) and locate the Touch Sens parameter (6).


  1. Press [Next] -OR- [Previous] to scroll through and select from the 10 available touch sensitivity maps.The choices are:
    • Linear (default)
    • Light 1
    • Light 2
    • Light 3
    • Hard 1
    • Hard 2
    • Hard 3
    • Piano Touch
    • Easy
    • GM Receive
  2. Press either [Voices] -OR- [Piano] to Exit the Function menu.

Question:
How do I enable a practice metronome in my CUP2/MP10/MPS10?

Answer:

To enable a metronome click to practice along with:

  1. Press [Rhythm] button.
  2. Using the [Next] and/or [Previous] buttons* to select one of the 5 available on-board metronome patterns (ID #74-78). For ex: #74 is a simple 1/4 note metronome (see “List of Rhythm Patterns” in the manual for details).*Shortcut: Rhythms can also be selected directly by pressing + holding down the [Rhythm] button while striking corresponding piano keys. Piano keys A#6-D7 correspond to the same “metro” Rhythms #74-78.
  3. To set the tempo, press the [Tempo] button, then, using the [Next] and/or [Previous] buttons, select your desired tempo.
  4. Press [Play/Stop] to start the metronome.
  5. Press [Play/Stop] again to stop the metronome.

Usage Details

    • Adjust the Metronome Volume:-Press & release [Volume] (aka Favorite 1)-Using the [Next] and/or [Previous] buttons to select the volume level (range = 1-9)


  • Save Metronome as a Favorite:-Press & hold one of the three [Favorite] buttons for 2 sec. to store the current rhythm/metronome pattern and voice selection to that selected location.-The selection can be recalled at any time by pressing the same [Favorite] button again.

Product Comparisons

Question:
What are the primary feature comparisons between our current Home Digital Pianos?

Answer:

Download the Kurzweil Home Digital Piano Model Comparison Chart here
(.pdf format).

Rhythm Mode

Question:
How do I enable a practice metronome in my CUP2/MP10/MPS10?

Answer:

To enable a metronome click to practice along with:

  1. Press [Rhythm] button.
  2. Using the [Next] and/or [Previous] buttons* to select one of the 5 available on-board metronome patterns (ID #74-78). For ex: #74 is a simple 1/4 note metronome (see “List of Rhythm Patterns” in the manual for details).*Shortcut: Rhythms can also be selected directly by pressing + holding down the [Rhythm] button while striking corresponding piano keys. Piano keys A#6-D7 correspond to the same “metro” Rhythms #74-78.
  3. To set the tempo, press the [Tempo] button, then, using the [Next] and/or [Previous] buttons, select your desired tempo.
  4. Press [Play/Stop] to start the metronome.
  5. Press [Play/Stop] again to stop the metronome.

Usage Details

    • Adjust the Metronome Volume:-Press & release [Volume] (aka Favorite 1)

      -Using the [Next] and/or [Previous] buttons to select the volume level (range = 1-9)


  • Save Metronome as a Favorite:-Press & hold one of the three [Favorite] buttons for 2 sec. to store the current rhythm/metronome pattern and voice selection to that selected location.

    -The selection can be recalled at any time by pressing the same [Favorite] button again.

Function Mode

Question:
How can I restore my CUP2/MP10/MPS10/M-1 to its factory defaults?

Answer:

There are two methods:

Power Up Method:

  1. Hold the C8 key down while switching on the power.
  2. Continue to hold
    C8 down until you see “RESETTING” in the display then release.

Function Menu Method:

  1. Press [Layer] + [Split] together to enter the Function menu.
  2. Press either [Layer] -OR- [Split] to move through the function menu (forwards and backwards) and locate the “Hard Reset” parameter.
    The display will show (scrolling): “Hard Reset?”
  3. Press [Next].
    The display will show (scrolling): “Confirm?”
  4. Press [Next] again to execute (press [Layer] -OR- [Split] to cancel).

Via either method, the unit will then erase its user memory, restore all factory settings and reboot.

Question:
How can I adjust the touch sensitivity of my CUP2/MP10/MPS10?

Answer:

To adjust the Touch Sensitivity (how the keyboard responds to your playing):

    1. Press [Layer] + [Split] together to enter the FUNCTION menu.


    1. Press either [Layer] -OR- [Split] to move through the Function menu (forwards and backwards) and locate the Touch Sens parameter (6).


  1. Press [Next] -OR- [Previous] to scroll through and select from the 10 available touch sensitivity maps.The choices are:
    • Linear (default)
    • Light 1
    • Light 2
    • Light 3
    • Hard 1
    • Hard 2
    • Hard 3
    • Piano Touch
    • Easy
    • GM Receive
  2. Press either [Voices] -OR- [Piano] to Exit the Function menu.

Record Button

Question:
How do I record without having an accompanying rhythm or metronome?

Answer:

Turning off the Metronome:

  1. Press [Layer] + [Split] together to enter the Function menu.
  2. Press either [Layer] -OR- [Split] to move through the function menu (forwards and backwards) and locate the “Metronome” parameter.
  3. Press [Previous] or [Next] to set Metronome to OFF.

Recording without a Rhythm:

  1. **Press Rhythm
  2. **Starting from Rhythm #1 press Previous to select from an ’empty’ song “U 09” down to “U 01”. Initially, these are essentially blank, rhythm-less songs.
  3. Press Record
  4. Press Play/Stop to begin recording
  5. Perform
  6. Press Play/Stop again when you wish to stop recordingNote: The display will now scroll and show “PRESS RECORD TO SAVE AS U1”. You have 9 user slots
    for storing your own recordings – U1 to U9. At this step here you can use the [Next] or [Previous] button to
    select any of these slots to save to. The display will reflect your selection (either U1, or U2, U3 etc).
  7. Once you have selected the slot to save to, press Record to save to that slot.

**Note: another option would to be to update the unit’s O/S. O/S v1.18 for the MP10 introduced, amongst other things, a new “Rec Rhythm: On/Off” function making the above process a simple on/off switch. The update is available here.

At the link above, scroll down below in the “Downloads tab area to select the update. Installation instructions and an addendum manual are included.


To Select and Playback a Previously Recorded Song:

  1. Press Rhythm
  2. Press the [Next] or [Previous] button to select any of the 9 user slots (U1 to U9).
  3. Press Play/Stop to playback current selection.

Troubleshooting

Question:
How can I restore my CUP2/MP10/MPS10/M-1 to its factory defaults?

Answer:

There are two methods:

Power Up Method:

  1. Hold the C8 key down while switching on the power.
  2. Continue to hold
    C8 down until you see “RESETTING” in the display then release.

Function Menu Method:

  1. Press [Layer] + [Split] together to enter the Function menu.
  2. Press either [Layer] -OR- [Split] to move through the function menu (forwards and backwards) and locate the “Hard Reset” parameter.
    The display will show (scrolling): “Hard Reset?”
  3. Press [Next].
    The display will show (scrolling): “Confirm?”
  4. Press [Next] again to execute (press [Layer] -OR- [Split] to cancel).

Via either method, the unit will then erase its user memory, restore all factory settings and reboot.

Question:
I am having difficulties getting my Windows PC running Vista/Win7/8 to output MIDI to my Kurzweil via USB. Do I need to install a driver?

Answer:

No. The current line of Kurzweil products have a standard class-compliant USB-MIDI implementation. They do not require the installation of any additional drivers.

Some background to be aware of:

Microsoft has been steadily REMOVING MIDI FEATURES from Windows since Vista. In Windows XP, Microsoft provided a MIDI Mapper control panel which allowed end users to select a MIDI output device. Since Vista this has not been available. As such, certain apps (like Windows Media Player – WMP) can no longer play MIDI songs triggering external MIDI devices because WMP is only routed to the internal Microsoft GS Synthesizer.

This means the MIDI app you choose to use must natively offer its own built-in MIDI mapping abilities OR you could possibly install a 3rd party MIDI mapper whose purpose is to replace the MIDI routing abilities removed from Windows. Fortunately,
these days, most commercial MIDI software products for PC, such as Cubase or Cakewalk, have a configuration screen which includes the MIDI device mapping necessary to route to an external MIDI device.

DOWNLOADS

User Manuals

MP-10 User Manual – 20.8 MB
Primary owner’s manual (.pdf)
2011-01-05

MP-10 User Manual Addendum – 82.7 KB
Addresses feature changes in latest OS update (.pdf)
(incl. listing of factory demo songs)
2011-09-27

MP-10 User Manual / Mode d’emploi (French) – 1.2 MB
Primary owner’s manual – French(.pdf)
2017-02-14

CUP2/MP10/MPS10 Program List – 32.2 KB
List of factory presets (.pdf)
2013-04-18

Supplemental Material

CUP2/MP10 Brochure – 549 KB
Product literature
2011-01-05

OS Updates

MP10 / MP10F v2.25 Update – 2.7 MB
.KUF file (O/S 2.21, Objects 2.23.0, Boot Loader 1.57);
Read Me (installation instructions and revision history); User Manual Addendum
2014-10-31

SUPPORT

Contact Pre-Sales

Do you have questions you need answered before you buy?

Product Registration

Register your new product with your local distributor.

Contact Distributor Support

Do you have questions about the use or application of your Kurzweil product?

Contact Service/Repair

Needing repair? Need to locate a local authorized service center? obtain parts?

Authorized Repair Facilities

Locate a Kurzweil repair facility near you.