Question:
How can I create a split keyboard Multi?
Answer:
Here is the basic flow for the creation of a split Multi:
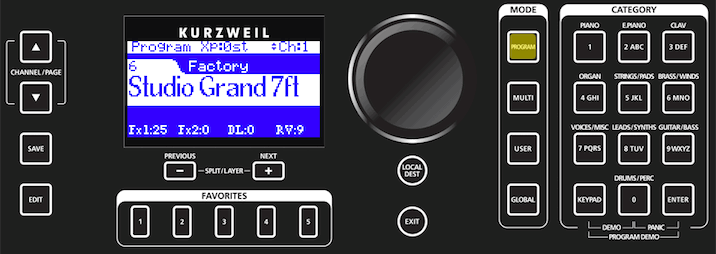
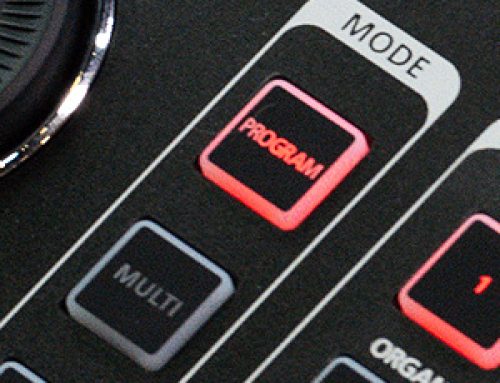
- Starting in Program Mode, select a Program for the right hand of the Split – for ex below we have selected piano program #6 “Studio Grand 7ft”:
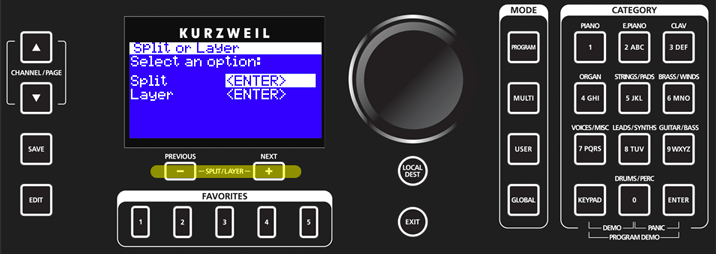
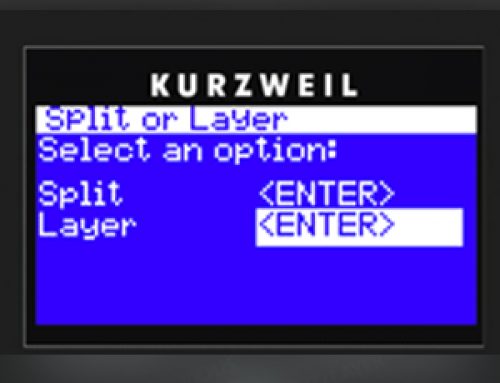
- Press the PREVIOUS and NEXT buttons simultaneously to access the “SPLIT or LAYER” tool page.
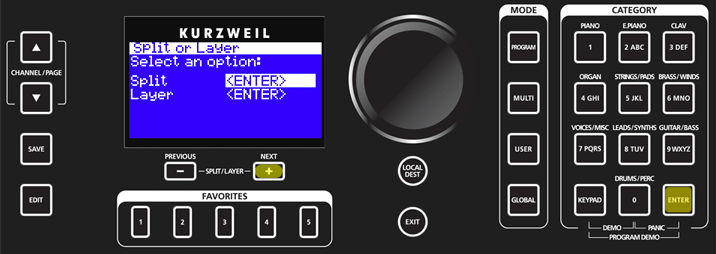
- If not already selected, use the PREVIOUS -or- NEXT buttons to select “Split” (as shown below), then press the ENTER button.
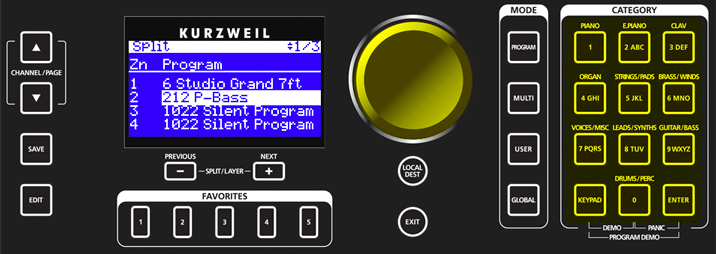
- On the “Split” Page, Zone 2 is selected with a default “212 P-Bass” Program selected for the left hand of the Split. As needed, use the ALPHA WHEEL or CATEGORY buttons to select a different Program for the left hand of the Split.
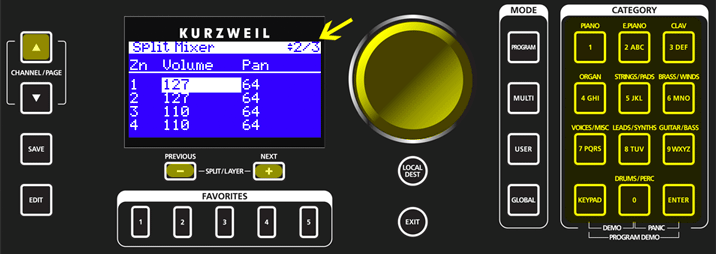
- (OPTIONAL) Press the CHANNEL/PAGE up button to navigate to the Mixer page (2/3) where you can adjust the Volume and Panning for each zone. As needed, use the PREVIOUS or NEXT buttons to select each parameter, and the ALPHA WHEEL or NUMERIC buttons to change the values:
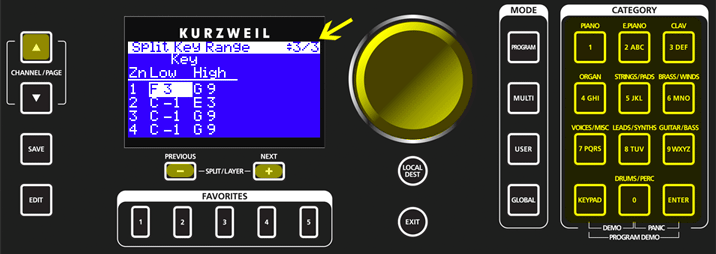
- (OPTIONAL) Press the CHANNEL/PAGE up button to navigate to the Split Key Range page (3/3) where you can adjust the Low and High key boundaries for each zone. As needed, use the PREVIOUS or NEXT buttons to select each parameter, and the ALPHA WHEEL or NUMERIC buttons to change the values:
TIP: to make selecting the desired key faster, highlight the field in question then press+hold ENTER and strike the desired piano key.
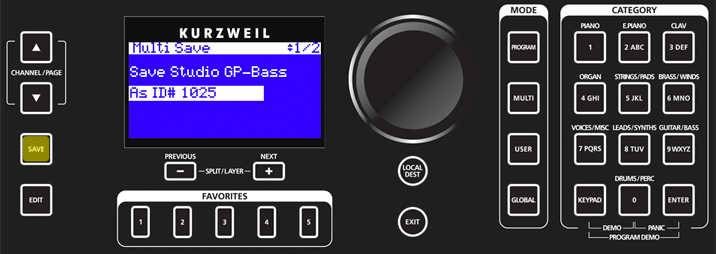
- Press the SAVE button to save your Split as a Multi:
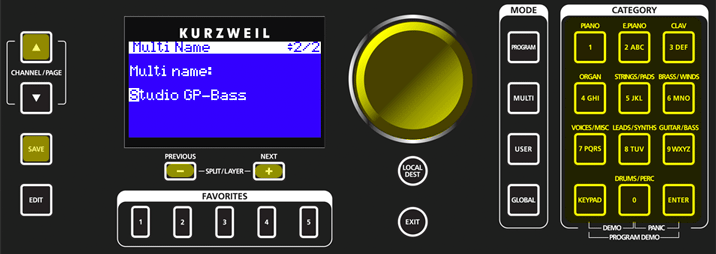
- (OPTIONAL) To rename the Multi, press the CHANNEL/PAGE up button to navigate to the Name page (2/2). Use the PREVIOUS and NEXT buttons to move the cursor to each character. Change the current character by using the ALPHA WHEEL, or use the keypad function of the CATEGORY buttons to type a character (full details on character entry can be found in the manual on pg 2-12).Press SAVE once and the desired name is input:
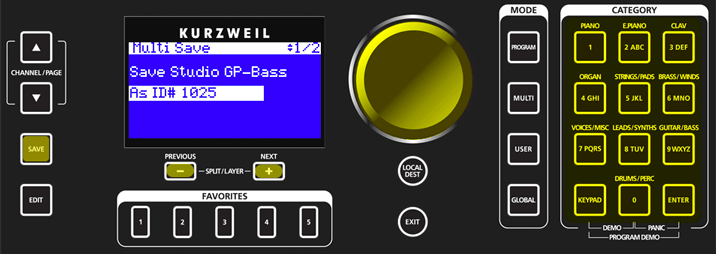
- Use the PREVIOUS / NEXT buttons, the ALPHA WHEEL and/or NUMERIC buttons to designate the User ID # to save your Multi to (User ID range = 1025-2048).Press the SAVE button to finalize the saving of your Multi:
Done.
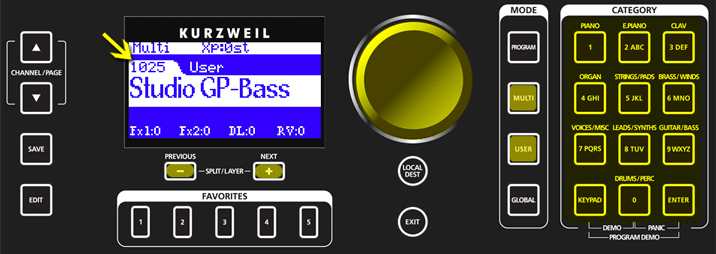
- To later recall this Multi, press MULTI (if not already in Multi mode), then Press USER and use the PREVIOUS / NEXT buttons, the ALPHA WHEEL and/or NUMERIC buttons to call up the ID chosen in step 9 above.
TIP: You can also opt to save this Multi as a Favorite for even quicker recall.
Power User Tips:
Once you have built your basic Multi, you may want to refine it further by EDITing the Multi directly. To start select your Multi, then press EDIT.
-
- To create more Multis in this same vein (templates):
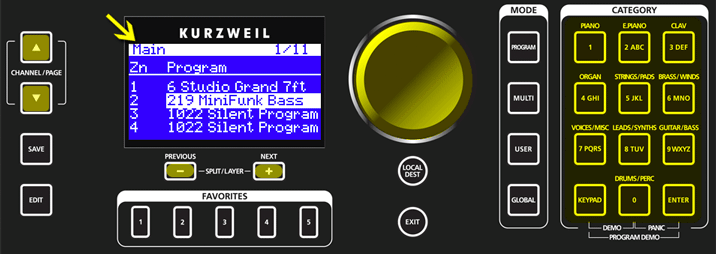
– As needed, press the CHANNEL/PAGE up or down buttons to navigate to the Main page (1/11). Use the PREVIOUS or NEXT buttons to select the desired zone, then use the ALPHA WHEEL and/or keypad to change the Program selection. For ex., below we are changing our bass sound to 219 MiniFunk:– Repeat for additional zones as needed.
– Re-save to a NEW ID location, effectively making a copy with just the new sound selection(s) made but maintaining all the other established parameter settings (split points, pedals, etc).
- To create more Multis in this same vein (templates):
-
- Transpose a Zone:
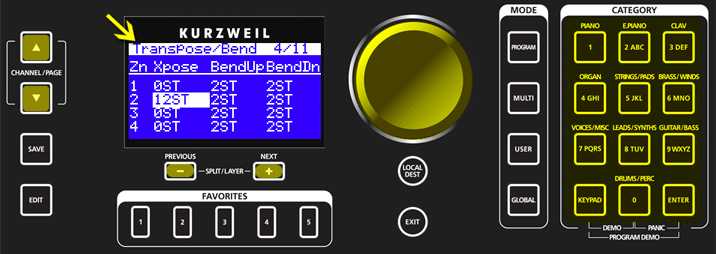
– As needed, press the CHANNEL/PAGE up or down buttons to navigate to the Transpose/Bend page (4/11). Use the PREVIOUS or NEXT buttons to select the desired zone and ‘Xpose’ parameter field, then use the ALPHA WHEEL and/or keypad to change the value – note Xpose is in semitones (ST). For ex., below we are transposing Zone 2 up one octave (12ST):
- Transpose a Zone:
-
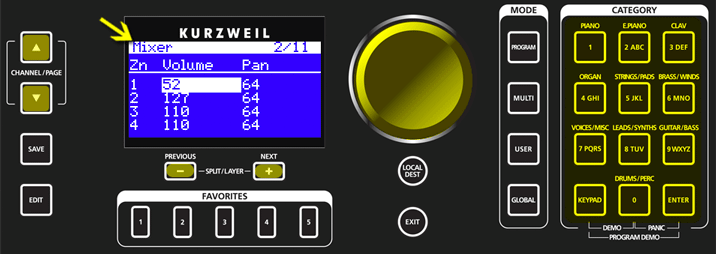
- Setting Zone Volumes and Pans:As needed, press the CHANNEL/PAGE up or down buttons to navigate to the Mixer page (2/11). Use the PREVIOUS or NEXT buttons to select the desired zone and parameter field, then use the ALPHA WHEEL and/or keypad to change the value.Volume range = 0-127;Pan range = 0-127 (0=hard left / 64=center / 127=hard right):
- Setting Zone Volumes and Pans:As needed, press the CHANNEL/PAGE up or down buttons to navigate to the Mixer page (2/11). Use the PREVIOUS or NEXT buttons to select the desired zone and parameter field, then use the ALPHA WHEEL and/or keypad to change the value.Volume range = 0-127;Pan range = 0-127 (0=hard left / 64=center / 127=hard right):
-
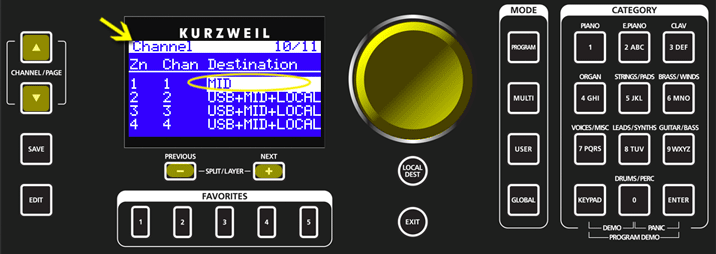
- Triggering external MIDI devices:As needed, press the CHANNEL/PAGE up or down buttons to navigate to the Channel page (10/11). Use the PREVIOUS or NEXT buttons to select the desired zone and parameter field, then use the ALPHA WHEEL to change the value.- The “Destination” for each zone can be set to either:
-
- ‘LOCAL’ (for playing internal SP6 sounds).
- ‘MIDI’ (for triggering external devices connected via MIDI cable).
- ‘USB’ (for triggering software on your computer connected via USB cable).
…or any combination of these 3 routing choices.
For example, below we have set zone 1 to trigger an external MIDI device exclusively while zones 2-4 trigger locally and externally, both via MIDI and USB-MIDI.
-
- Triggering external MIDI devices:As needed, press the CHANNEL/PAGE up or down buttons to navigate to the Channel page (10/11). Use the PREVIOUS or NEXT buttons to select the desired zone and parameter field, then use the ALPHA WHEEL to change the value.- The “Destination” for each zone can be set to either:
-
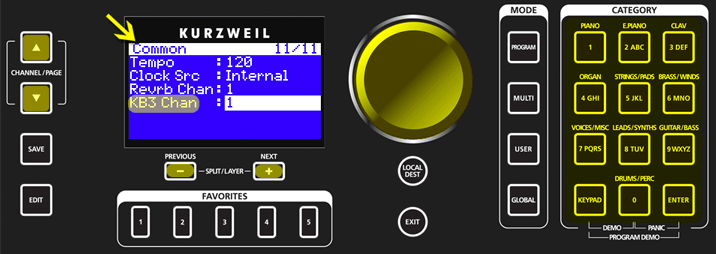
- KB3 Programs in Multi Mode:Only ONE KB3 program can be used at a time as determined by the KB3 Channel parameter (KB3 Chan). As needed press the CHANNEL/PAGE up or down buttons to navigate to the Common page (11/11). Use the PREVIOUS or NEXT buttons to select the desired channel to use for playing KB3 programs – the default is channel 1:
When a KB3 program is properly selected (meaning the Zone channel # matches the designated KB3 Chan) it will appear as follows on the Main page – note the [KB3] icon between the Zone # and Program name:
When a KB3 program is improperly selected (meaning the Zone channel # does NOT match the designated KB3 Chan) it will appear as follows on the Main page – note the [KB3] icon between the Zone # and Program name is now missing – in such a case you will hear the last valid non-KB3 program sounding:
As you can only play ONE KB3 program at a time, this means you CANNOT have two KB3-generated organs playing simultaneously. So in order to create any sort of dual-manual B3 Multi this means either:
1) Using one of the two non-KB3 B3-style presets as your second organ: #53 “VAST-ly Organ” -or- #54 “VAST Bars” (these are VAST/sample-generated B3s and thus not bound by the same constrains as KB3);-OR-
2) Trigger an external module or VI as your secondary B3 (using the techniques detailed above on triggering external MIDI devices).
- KB3 Programs in Multi Mode:Only ONE KB3 program can be used at a time as determined by the KB3 Channel parameter (KB3 Chan). As needed press the CHANNEL/PAGE up or down buttons to navigate to the Common page (11/11). Use the PREVIOUS or NEXT buttons to select the desired channel to use for playing KB3 programs – the default is channel 1:
(Further details can be found starting on pg 2-7 of the SP6 Musician’s Guide).

