
Legacy Model
Downloads and support materials maintained here as a courtesy to owners.
OVERVIEW |
Brand NEW German 9′ Grand Piano

A game-changer. 32 killer programs. Amazing tone, realism, and expression FAR beyond what you thought possible in a stage piano. Perfectly matched with a weighted Fatar TP-100 action.
KB3 ToneReal™ Organs

Modeled after classic organs. Featuring all the controls you want and more, including 9 realistic drawbars.
256 Factory Programs

From classic to cutting-edge. The best sounds from our PC3K and KORE 64 collections plus our NEW piano, Vintage Electric Pianos, Clavinets, Synthesizers, rich and realistic String Sections and Orchestras, Guitars, Percussion and much more.
256 Factory Multis

Layered, sublime, fearless and funky – our Multis will have your inspiration up and running in no time! Up to 4 zones, split/layer, extensive MIDI control, individual zone volume and mute control.
Powerful FX Engine

Award-winning Reverbs, Delays, Choruses, Flangers, Phasers, Distortions, Rotary Amplifiers, Compressors and more.
PERFORMANCE
Front Panel 3-Band Master EQ

Room too boomy? No problem. Dial it in with Bass, Treble and sweepable Midrange.
22 Programmable Physical Controllers

9 Sliders, 6 Switches, 2 Wheels, 2 Switch Pedal Inputs, 1 Continuous Control Pedal Input. (1 sustain/switch pedal is included).
Easy Access Transpose Buttons

Dedicated -/+ controls conveniently located above the Pitch/Modulation wheels.
CONTROLS
Front Panel Master Compressor & 3-Band EQ

Room too boomy? Need to add some punch? No problem. Dial it in with the Master Compressor & EQ section featuring Bass, Treble and sweepable Midrange.
23 Programmable Physical Controllers

9 Sliders (with brilliant LED ladders), 6 Switches, 2 Wheels, 3 Switch Pedal Inputs (which support half-damper for pianos), 2 Continuous Control Pedal Inputs and Aftertouch. (1 sustain/switch pedal is included).
Easy Access Controls

Dedicated -/+ Transpose, Tap Tempo and sound Variation controls conveniently located right above the Pitch/Modulation wheels.
USER INTERFACE
Sound Selection

Easy Category and Program/Multi selection. Save your own preset for each Category.
All specifications subject to change without notice.
Favorites Section

Access your 10 Favorite sounds with ONE button press! Conveniently located right below Artis’ display.
Software Editors

Get deeper into editing your Artis Programs and Multis.
SPECS |
All specifications subject to change without notice.
| Keyboard: | 88 note fully-weighted hammer-action with velocity sensitive keys (Fatar TP/100LR) |
| Display: | 240×64 pixel monochrome LCD with front-panel contrast adjust |
| Polyphony: | 128 Voice Polyphony, dynamically allocated |
| Multitimbral: | 16 parts (one per MIDI channel) |
| Quick Split/Layer: | Easy access with adjustable relative volume (up to 4 zones) |
| Factory Programs: | 256 stunning factory Programs featuring the all new German Grand Piano along with a wide selection of sounds from the acclaimed PC3 and KORE 64™ expansion (download full “object list” here) |
| User Programs: | 256 |
| Factory Multis: | 256 factory-crafted Multis – featuring up to 4 independent zones |
| User Multis: | 256 |
| General MIDI: | No |
| Master EQ Section: | Dedicated front-panel 3-band EQ with sweepable mid and on/off switch |
| Effects: | • Over 1000 complex effect chains, incorporated into programs featuring our award winning effects – reverbs, delays, chorus, flange, phaser, EQs, distortions, rotary speaker simulators, compressors, and more • 16 total FX units (chains can not be edited, but a chain can be selected in Multi Mode) |
| Controllers: | • 1 pitch wheel • 1 modulation wheel • 9 front panel sliders • 9 KB3 control switches/control/zone mute switches • 1 variation switch • 2 transpose switches • 2 switch pedal inputs, each supporting single or dual, switch or half-damper* pedals (1 switch/sustain pedal is included) • 1 continuous control pedal input(*for MIDI controller functionality only) |
| Analog Outputs: | • Two 1/4″ balanced TRS analog (24-bit DACs) • +21dBu maximum output • 400Ω balanced source impedance |
| Audio Inputs: | One stereo 1/8″ back-panel input for connecting your favorite MP3 player or other audio source for accompaniment playback |
| Headphones: | • 1 front panel 1/4″ headphone output • 130mW into 32 ohm headphones |
| MIDI: | In, Out |
| USB: | • Complete MIDI functionality over USB • User program/multi file transfer to/from PC/Mac/Flash Drive • Operating System updates from PC/Mac/Flash Drive |
| FREE OS Updates: | OS updates over USB and/or Flash Drive |
| Included Accessories: | Power cable, Switch pedal, USB cable, (4) self adhesive feet |
| Height: | (5.5″) (14cm) |
| Depth: | (15.5″) (39.5cm) |
| Length: | (54.5″) (138.5cm) |
| Weight: | (46 lb.) (21 kg) |
| Power: | Internal Power Supply, free voltage 90-265V AC 50-60Hz, 10 Watts |
IMAGES |


VIDEOS |
Artis – First Look
Teaser Trailer
Artis – Featuring Dave Limina
Performance by Dave Limina
Artis – Featuring Erik James
Performance by Erik James
Artis – Pianos
Demonstration by Muzykuj (Poland)
Artis – E. Pianos
Demonstration by Muzykuj (Poland)
Artis – Multis
Demonstration by Muzykuj (Poland)
Artis Demonstration by Daniel Fisher
Sweetwater Sound
Artis Demonstration Video
Demonstration by Christian Pearl. (Javea Rock Academy Studios)
Artis Jamming (part 1)
Demonstration by Space4Keys/Pianosound (Italy)
Artis Journey
Trailer from Sound Service (Germany)
Artis PlugSE
Overview of SoundTower’s Artis DAW Plugin for the Mac/PC
Artis Preset Walk Thru
Demonstration by Kytary (Czech Rep.)
Artis Review
By Kytary (Czech Rep.)
Frank Lucas and Pandorum Performance
Pandorum – …..And She Danced Again…..
Musikmesse 2013 – Demo 1
Performance from the show floor at Musikmesse
Musikmesse 2013 – Demo 2
Feature walk-thru live from Musikmesse
FAQs |
Basic Concepts & User Interface
Question:
When I step on the sustain pedal using a KB3-based program, it is currently controlling the leslie rotor speed. How can I change that to traditional sustain operation?
Answer:
Here is how to reassign SW 1 to act as a traditional sustain pedal for KB3-based programs:
-
- Leave the sustain pedal connected as usual (to the SW 1 pedal jack).
- Go to the GLOBAL mode.
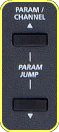
- Using the Param/Channel buttons, highlight the “Rotary S/F Override” parameter:

- Using the data wheel, set it to “Variation”:


NOTES:
“Variation+Sustain” = the Variation (Rotary S/F) button AND the sustain pedal will control the leslie rotary speed.
“Variation” = only the Variation (Rotary S/F) button will control the leslie rotary speed; the sustain pedal will act as traditional sustain.
- Press PROGRAM to return to Program mode.
Now all KB3-generated programs will use the Sustain/SW1 pedal for sustain.
Question:
How can I customize the Artis’ touch sensitivity?
Answer:
-
- Press the mode button – you will see:
- Using the cursor navigation arrow buttons, highlight the “Velocity Map” parameter.
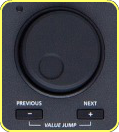
- Using the alpha wheel and/or Previous/- Next/+ buttons, adjust to taste:
- Press the
 mode button – you will see:


The default map (Medium) provides the widest range of velocity expression, but you may want to choose a different map if the default does not suit your playing style. You can select from any of the following settings:
| Light Lighter Lightest |
Makes it increasingly easier to produce high MIDI velocity values for the same key strike velocity. These maps work best for those preferring a light touch. |
| Medium | The Artis default map. Medium, allows MIDI velocities to pass unchanged. It follows a linear response. |
| Hard Harder Hardest |
Makes it increasingly harder to produce high MIDI velocity values for the same key strike velocity. These maps work best for those with a heavy touch. |
| PianoTouch | Simulates the general velocity response of an acoustic piano, and is best suited for playing acoustic piano programs. |
| Easy Touch | Similar to the “Light” settings. Makes higher velocities easier to play, but allows more sensitive control over playing high velocities by not boosting the MIDI velocity for fast strike velocities as much as it does for medium strike velocities. |
| GM Receive | Mimics the velocity response commonly used by keyboards that use the General MIDI (GM) sound set. The GM Receive map makes medium strike velocities produce higher MIDI velocities compared to the Linear map. |
- Press PROGRAM or MULTI to exit the Global menu. Your setting selection will be remembered across power cycles.
Question:
How can I store my most needed Programs/Multis as Favorites for quick recall?
Answer:
Much like car radio station presets, the Artis lets you store up to 10 Favorite Programs/Multis for instant one-button recall.
Here’s how:
-
- Select the a Program or Multi you wish to store as a Favorite.Ex:
- Select the a Program or Multi you wish to store as a Favorite.Ex:

-
- Press and hold a given FAVORITES button for a few seconds to store the current Program or Multi to that button location.
- Press and hold a given FAVORITES button for a few seconds to store the current Program or Multi to that button location.

-
- You will see a pop-up message displayed as confirmation:
- You will see a pop-up message displayed as confirmation:

- Go back to step 1 and repeat as needed.
To later recall the given Favorite, from Program or Multi mode, simply press the corresponding FAVORITES button.
Question:
Where can I obtain a list of the factory preset Programs & Multis for the Artis?
Answer:
Under the DOWNLOADS Tab on the Artis Product page (under ‘User Manuals’) you will find a link titled “Artis Factory Objects List”. The download contains both .pdf and .xls files listing all system objects (programs, multis, and effects chains).
In addition Appendix C of the Musician’s Guide also lists all of the factory Programs by category.
Question:
I am using my Artis with a DAW (or external controller) and need to understand what combination of MIDI Bank and Program change messages to send to it to call up the sounds I need.
Answer:
Here is what the Artis needs to receive when selecting programs via MIDI:
-
- MIDI Bank messageBy default*, the Artis uses MIDI Bank message cc#32 (aka Bank LSB) value = 0-127, to send/receive bank info.*(BankSel: 0/32 – set in the Global menu)
- MIDI Program Change messageFollowing the Bank message, a standard Program Change is used value= 0-127 to select the desired program from within the designated bank.
The table below shows the MIDI Bank (column 1) and Program Change (column 2) values needed to select any given Artis Program via MIDI. Note all banks are 128 entries deep:
Values Sent To Artis Artis Program Selected MIDI Bank #
(cc#32 value)Program Change ID Range 0 0-127 1-128 Factory 1 0-127 129-256 Factory 2 0-127 257-384 User 3 0-127 385-512 User Important Note: the Artis displays the program change numbers on screen off by “1” ID# higher.
ie MIDI Program Change #0 = Artis Screen ID# 1.
Examples:
Ex 1: You want to call up #33 Stevie’s Rhds:
From your DAW (or alternate controller), you send:
MIDI Bank (cc32) = 0 *Program Change = 32 *Reminder: the Artis displays the program change numbers on screen off by “1” ID# higher.
Ex 2: You want to call up #161 SuperSaw:
From your DAW (or alternate controller), you send:
MIDI Bank (cc32) = 1 *Program Change = 32 *Note: 161-128-1= #32.
(ie Program #161 is the 32nd program in MIDI Bank 1.)
Ex. 3:You want to call up #512 in the User bank:
From your DAW (or alternate controller), you send:
MIDI Bank (cc32) = 3 *Program Change = 127 *Note: 512 – (128×3) – 1 = 127
(i.e. Program #512 is the 127th program in MIDI Bank 3)
Global Mode
Question:
When I step on the sustain pedal using a KB3-based program, it is currently controlling the leslie rotor speed. How can I change that to traditional sustain operation?
Answer:
Here is how to reassign SW 1 to act as a traditional sustain pedal for KB3-based programs:
-
- Leave the sustain pedal connected as usual (to the SW 1 pedal jack).
- Go to the GLOBAL mode.
- Using the Param/Channel buttons, highlight the “Rotary S/F Override” parameter:
- Using the data wheel, set it to “Variation”:
NOTES:
“Variation+Sustain” = the Variation (Rotary S/F) button AND the sustain pedal will control the leslie rotary speed.
“Variation” = only the Variation (Rotary S/F) button will control the leslie rotary speed; the sustain pedal will act as traditional sustain.
- Press PROGRAM to return to Program mode.
Now all KB3-generated programs will use the Sustain/SW1 pedal for sustain.
Question:
How can I customize the Artis’ touch sensitivity?
Answer:
-
- Press the mode button – you will see:
- Using the cursor navigation arrow buttons, highlight the “Velocity Map” parameter.
- Using the alpha wheel and/or Previous/- Next/+ buttons, adjust to taste:
- Press the
The default map (Medium) provides the widest range of velocity expression, but you may want to choose a different map if the default does not suit your playing style. You can select from any of the following settings:
| Light Lighter Lightest |
Makes it increasingly easier to produce high MIDI velocity values for the same key strike velocity. These maps work best for those preferring a light touch. |
| Medium | The Artis default map. Medium, allows MIDI velocities to pass unchanged. It follows a linear response. |
| Hard Harder Hardest |
Makes it increasingly harder to produce high MIDI velocity values for the same key strike velocity. These maps work best for those with a heavy touch. |
| PianoTouch | Simulates the general velocity response of an acoustic piano, and is best suited for playing acoustic piano programs. |
| Easy Touch | Similar to the “Light” settings. Makes higher velocities easier to play, but allows more sensitive control over playing high velocities by not boosting the MIDI velocity for fast strike velocities as much as it does for medium strike velocities. |
| GM Receive | Mimics the velocity response commonly used by keyboards that use the General MIDI (GM) sound set. The GM Receive map makes medium strike velocities produce higher MIDI velocities compared to the Linear map. |
- Press PROGRAM or MULTI to exit the Global menu. Your setting selection will be remembered across power cycles.
Question:
What programs/setups from other Kurzweil instruments can I load in my Artis?
Answer:
The Artis can load content from the following Kurzweil instruments and file types:
| Instrument/File | File Type |
|---|---|
| Artis | .ART |
| PC3 | .PC3 |
| PC3LE | .PLE |
| PC3K | .P3K |
| SP4 | .SPX |
Loading Compatible Object File Types
Aside from loading objects from its own files, the Artis can load sounds and objects from other Kurzweil instruments.
When loading other file types, the Artis will attempt a conversion of the objects in those files. The Artis can often exactly match the sound and function of the original objects. In some cases object parameters may not be converted.
Notes:
– The Artis does *not* support loading user samples.
– The Artis can’t load .MID files.
– The Artis allows for minimal editing of Programs and Multis, other object types can be loaded but not edited.
– The Artis can load Setups/Multis from other instruments, but Zones greater than 4 will not be loaded, and Riffs are not compatible.
– Programs/Multis/Setups loaded into the Artis may sound different if they contain assignments for physical controllers which are not available on the Artis.
Question:
How can I load an Artis user data file (.ART) from a USB flash/thumb drive?
Answer:
“LOAD” Procedure:
-
- Plug a USB flash/thumb drive into the Artis back-panel USB “Storage ” port.
-
- On the Artis, press the Global mode button, then press the “LOAD” soft button:
- Press “Device”:(Note: USB-MIDI connections will temporarily be severed when engaging the LOAD function).
- Using the data wheel, “Parent” and “Open” soft buttons, navigate to and highlight the desired .ART file to load:
- Choose your load method, “FILL” or “OVWRTE”:”FILL” – loads the file’s contents into the first empty User ID slot, and then subsequent empty slots, without erasing existing user data:
“OVWRTE” – (aka Overwrite) ERASES all USER Programs/Multis currently in memory, replacing them with the loaded file’s contents (factory banks are not affected):
IMPORTANT: Choosing OVWRTE will bring up an alert prompt, cautioning you that “Overwrite can delete existing user objects. Are you sure?”. Press “Yes” to proceed or “No” to cancel. Before opting to use OVWRTE, be sure that any User Programs/Multis currently residing in the Artis, that you wish to keep, are already themselves backed up to external disk.
- A brief “Loading…” message will be seen while the file is loaded.
Global                 LOAD


                  Loading...
Press “OK” when the load is complete.
- On the Artis, press the Global mode button, then press the “LOAD” soft button:


- Press Program or Multi to Exit the Global mode. Your computer will issue a “device removal” message – you can cancel/ignore this.
Notes:
|
Question:
How can I load an Artis user data file (.ART) directly from my Mac/PC via USB cable?
Answer:
“LOAD” Procedure:
-
- With both the Artis and your computer powered on, connect a USB cable between the Artis back-panel USB “Computer” port and any free USB port on your computer.
-
- On the Artis, press the Global mode button, then press the “LOAD” soft button:
- Press “PC”:Your computer will now mount a temporary removable disk which will act as the conduit between your computer and the Artis.(Note: USB-MIDI connections will temporarily be severed when engaging the LOAD function).
- On your computer, copy the ONE desired .ART file to the temporary removable disk and wait for it to complete copying.Note: the system only supports loading one file at a time.
- Choose your load method, “FILL” or “OVWRTE”:”FILL” – loads the file’s contents into the first empty User ID slot, and then subsequent empty slots, without erasing existing user data:
“OVWRTE” – (aka Overwrite) ERASES all USER Programs/Multis currently in memory, replacing them with the loaded file’s contents (factory banks are not affected):
IMPORTANT: Choosing OVWRTE will bring up an alert prompt, cautioning you that “Overwrite can delete existing user objects. Are you sure?”. Press “Yes” to proceed or “No” to cancel. Before opting to use OVWRTE, be sure that any User Programs/Multis currently residing in the Artis, that you wish to keep, are already themselves backed up to external disk.
- A brief “Loading…” message will be seen while the file is loaded.
Global               LOAD


                  Loading...
Press “OK” when the load is complete.
- On the Artis, press the Global mode button, then press the “LOAD” soft button:


- Press Program or Multi to Exit the Global mode. Your computer will issue a “device removal” message – you can cancel/ignore this.
Notes:
|
Question:
How can I save (backup) all of my Artis’s user data to a USB flash/thumb drive?
Answer:
Q:How can I save (backup) all of my Artis’s user data to a USB flash/thumb drive?
The Artis saves all data from both User Banks (Program and Multis) into one file with an “.ART” extension.
“STORE” Procedure:
-
- Plug a USB flash/thumb drive into the Artis back-panel USB “Storage ” port.
- Press the Global mode button, then press the “STORE” soft button:
- Press “Device”:(Note: USB-MIDI connections will temporarily be severed when engaging the STORE function).
- Press “Store” to the designate the current directory location to save your file to:
- Name your file. Use the Previous(-) and Next(+) buttons to advance the cursor. Use the data wheel and/or alphanumeric keypad to enter characters. Then press “Store” to save:
- A brief “Storing…” message will be seen while the file is saved.
Global               STORE


                  Storing...
Press “OK” when the save is complete.
- Press Program or Multi to Exit the Global mode.


Notes:
|
Question:
How can I save (backup) all of my Artis’s user data directly to my Mac/PC via USB cable?
Answer:
The Artis saves all data from both User Banks (Program and Multis) into one file with an “.ART” extension.
“STORE” Procedure:
-
- With both the Artis and your computer powered on, connect a USB cable between the Artis back-panel USB “Computer” port and any free USB port on your computer.
-
- On the Artis, press the Global mode button, then press the “STORE” soft button:
- Press “PC”:Your computer will now mount a temporary removable disk which will act as the conduit between your computer and the Artis.(Note: USB-MIDI connections will temporarily be severed when engaging the STORE function).
- Name your file. Use the Previous(-) and Next(+) buttons to advance the cursor. Use the data wheel and/or alphanumeric keypad to enter characters. Then press “Store” to save:
- A brief “Storing…” message will be seen while the file is saved.
Global               STORE


                  Storing...
- On the Artis, press the Global mode button, then press the “STORE” soft button:


- IMPORTANT: You now need to COPY (drag and drop) the resultant “.ART” file out of the temporary removable disk mounted on your computer to any location on your computer hard drive where you wish to store this file long term. It is critical that you do this *before* you press “OK” as the removable disk will be ejected and .ART file erased from it when you do.Press “OK” only AFTER the file has been safely copied out of the temporary drive to your computer.
- Press Program or Multi to Exit the Global mode. Your computer will issue a “device removal” message – you can cancel/ignore this.
Notes:
|
Question:
How can I use MIDI Bank and Program Changes to select Multis remotely?
Answer:
To select Multis via MIDI you need to go into the Global/MIDI mode and set the “Local Key Channel” (manual ref. pg 9-10) to match the one channel you are wanting to send bank/program changes to the Artis on.

Once the Local Key Channel is set, put the Artis into Multi mode and send a:
- cc32/Bank LSB message (value range = 0-4), followed by
- program change (value range = 0-127)
MIDI ‘Banks’ are in groups of 128 entries, 0-127.
So for example, if you wanted to select Multi #168 SynBass/Strings you would send:
- cc32 = 1
- Pchg = 40
The way to figure this out is fairly simple:
- Multi# ÷ 128 = B (where B = MIDI Bank and is the whole number to the left of any decimal point)
- Multi# – (B x 128) = program change number
Be sure too that you are running the latest OS. The latest update is available here.
Question:
What is the maximum quantity of files that can be saved to a single directory of a flash/thumb drive?
Answer:
Up to 198 files per subdirectory are supported.
Question:
How can I assign a switch pedal to navigate my Programs/Multis/Favorites?
Answer:
-
- With the Artis power turned off, connect a switch pedal to either SW1 or SW2.NOTE: each Artis switch pedal input supports using either single (1/4″ TS) or dual (1/4″ TRS) switch pedals. This permits up to 4 switch pedals (when two dual pedals are used).
- In the GLOBAL Mode, using the PARAM/CHANNEL buttons, select the Pedal Override parameter that corresponds to the physical input you connected your pedal to. As each pedal input can support single or dual pedals, there are four total possibilities to chose from: SW1a, SW1b, SW2a, SW2b. If only using single pedals, only the ‘a’ side parameter is used.For ex: if you connect a single pedal to SW2, select “Pedal SW2a Override”.

- There are 4 options to choose from related to navigating on-screen selections with a pedal. Using the data wheel, choose the one that suits your needs:
DataInc Move forwards through the list of Programs or Multis. DataDec Move backwards through the list Programs or Multis.
FavoriteInc* Move forwards through the list of stored Favorites. FavoriteDec* Move backwards through the list of stored Favorites. *NOTE: when choosing one of the “Favorites”, the list will cycle/wrap around the 10 available button slots.


MIDI Controllers
Question:
What pedals can I use with my Artis / Artis 7 / Artis SE / Forte SE / SP6?
Answer:
Single Switch Pedals
The instrument ships with one KP-1 Switch Pedal
however any standard foot switch pedal (with 1/4″ mono connection) will be compatible. Polarity is a non-issue as the instrument checks the pedal polarity on power up and calibrates itself accordingly. For this to work, be sure to plug the switch pedal in before turning on the instrument, and do not step on the pedal during the boot up process. Doing otherwise can lead to the pedal working in reverse or not at all. If that occurs, simply power down, be sure the pedal is fully connected, then power back up without touching the pedal.
Dual-Switch Pedal Inputs
The instrument supports connecting two switch pedals into each switch pedal input. You can connect a dual switch pedal with a single 1/4″ stereo plug (not sold by Kurzweil) or employ a “Y” adapter (stereo (M) to dual-mono (F)) to connect two standard/single pedals to each input jack.
Doing so would provide a total of four switch pedals. Again remember to make all switch-pedal connections with the instrument powered off.
Half-Damper Pedals
The instrument* also supports connecting half-damper pedals (sold separately) to either of the switch pedal inputs.
The Kurzweil KP-1H half-damper pedal is the recommended pedal and is available via any Kurzweil dealer.
In addition, there are several other manufacturers of half-damper pedals on the market. Not all are compatible or interchangeable.
KORG pedals are compatible with the Forte.
ROLAND and YAMAHA pedals are not compatible.
(*Note: Artis/Artis 7/Artis SE users: Half-damper is for MIDI output only. It does not effect internal sounds)
Continuous Controller Pedals (CC Pedal)
The instrument requires a CC Pedal with a TRS 1/4″ connector and 10k linear potentiometer, such as the Kurzweil CC-1 (sold separately). Most manufacturers EXCEPT Yamaha and Korg make pedals with the same specifications and should work. Yamaha and Korg pedals typically use an exponential potentiometer and therefore will not work correctly.
CC-1 Wiring Spec
The Control Pedal must be wired to a single stereo (TRS) 1/4″ plug as follows:
- Wiper to tip connection of 1/4″ plug
- Top end of resistance element to Ring connection
- Bottom end of resistance to Sleeve connection

How can I assign a switch pedal to navigate my Programs/Multis/Favorites?
Answer:
-
- With the Artis power turned off, connect a switch pedal to either SW1 or SW2.NOTE: each Artis switch pedal input supports using either single (1/4″ TS) or dual (1/4″ TRS) switch pedals. This permits up to 4 switch pedals (when two dual pedals are used).
- In the GLOBAL Mode, using the PARAM/CHANNEL buttons, select the Pedal Override parameter that corresponds to the physical input you connected your pedal to. As each pedal input can support single or dual pedals, there are four total possibilities to chose from: SW1a, SW1b, SW2a, SW2b. If only using single pedals, only the ‘a’ side parameter is used.For ex: if you connect a single pedal to SW2, select “Pedal SW2a Override”.
- There are 4 options to choose from related to navigating on-screen selections with a pedal. Using the data wheel, choose the one that suits your needs:
DataInc Move forwards through the list of Programs or Multis. DataDec Move backwards through the list Programs or Multis.
FavoriteInc* Move forwards through the list of stored Favorites. FavoriteDec* Move backwards through the list of stored Favorites. *NOTE: when choosing one of the “Favorites”, the list will cycle/wrap around the 10 available button slots.
Need more info? Check out the following links:
Multi Mode
Question:
How can I customize the Artis’ touch sensitivity?
Answer:
-
- Press the mode button – you will see:
- Using the cursor navigation arrow buttons, highlight the “Velocity Map” parameter.
- Using the alpha wheel and/or Previous/- Next/+ buttons, adjust to taste:
- Press the
The default map (Medium) provides the widest range of velocity expression, but you may want to choose a different map if the default does not suit your playing style. You can select from any of the following settings:
| Light Lighter Lightest |
Makes it increasingly easier to produce high MIDI velocity values for the same key strike velocity. These maps work best for those preferring a light touch. |
| Medium | The Artis default map. Medium, allows MIDI velocities to pass unchanged. It follows a linear response. |
| Hard Harder Hardest |
Makes it increasingly harder to produce high MIDI velocity values for the same key strike velocity. These maps work best for those with a heavy touch. |
| PianoTouch | Simulates the general velocity response of an acoustic piano, and is best suited for playing acoustic piano programs. |
| Easy Touch | Similar to the “Light” settings. Makes higher velocities easier to play, but allows more sensitive control over playing high velocities by not boosting the MIDI velocity for fast strike velocities as much as it does for medium strike velocities. |
| GM Receive | Mimics the velocity response commonly used by keyboards that use the General MIDI (GM) sound set. The GM Receive map makes medium strike velocities produce higher MIDI velocities compared to the Linear map. |
- Press PROGRAM or MULTI to exit the Global menu. Your setting selection will be remembered across power cycles.
Question:
How can I combine two or more programs together in layer and/or split fashion?
Answer:
The Artis Multi mode is the ideal place to construct performance layers and splits. Each Multi permits the combination of up to 4 unique program zones. Multis can be built completely from scratch from within Multi mode itself or, for a faster start, using the dedicated front-panel “Layer” and “Split” soft button tools which simplify the process.
(complete parameter details can be found in Chpt. 7 & 8 of the Musician’s Guide).
Here are the basic steps for creating Split and Layer combinations:
-
- From Program mode, select the initial sound you wish to start with – for ex below we have selected a piano program:
- From here you can proceed following one of two paths adding a SPLIT OR a LAYER zone:
(a) Press “SPLIT” to create a split zone: OR (b) Press “LAYER” to create a layer zone:
- From Program mode, select the initial sound you wish to start with – for ex below we have selected a piano program:
.gif)


-
- Next, press PROG and select the desired Program to use for this new split or layer zone:
(a) For ex, here we chose an acoustic bass: OR (b) For ex, here we chose a synth pad:
- Next, press PROG and select the desired Program to use for this new split or layer zone:


-
- If desired, press VOLUME and change the Volume balance between this new zone and the primary program (Piano in our ex):Note: this is a ‘balance’ control. Positive values will lower the primary program volume; negative values lower the volume of the newly added zone.
(a) For ex, here we raised the volume of the bass:
(lowers the piano)OR (b) For ex, here we lowered the volume of the pad:
- If desired, press VOLUME and change the Volume balance between this new zone and the primary program (Piano in our ex):Note: this is a ‘balance’ control. Positive values will lower the primary program volume; negative values lower the volume of the newly added zone.


-
- If needed, press XPOSE and change the Transposition (Xpose) of the newly added zone by +/- 2 octaves (in semitones):
(a) Here we opted to raise the bass an octave: OR (b) Here we chose to NOT transpose the pad:
- If needed, press XPOSE and change the Transposition (Xpose) of the newly added zone by +/- 2 octaves (in semitones):


-
- Lastly, if this is a split zone, you can press KEY and change the default split-point (B3):TIP: use the ASSIGN feature to select the Split- hold down and press the desired piano key.
(a) Here we chose to change the split point to C3:
- Lastly, if this is a split zone, you can press KEY and change the default split-point (B3):TIP: use the ASSIGN feature to select the Split- hold down
 and press the desired piano key.
-
- Press the front panel SAVE button (will be lit) to store this Multi the User bank:
- Press the front panel SAVE button (will be lit) to store this Multi the User bank:

-
- By default you are first brought to the ID page. Choose the User ID where you would like to save this Multi to (range #257-512):For ex, we chose ID #258:
- By default you are first brought to the ID page. Choose the User ID where you would like to save this Multi to (range #257-512):For ex, we chose ID #258:

-
- Press the NAME soft button to name your Multi creation:
- Press the NAME soft button to name your Multi creation:

-
- Using the alpha numeric keypad, enter a name for your Multi (see pg. 6-19 in the manual for details on using the alphanumeric keypad):
(a) Press “Save” when done: OR (b) Press “Save” when done:
- Using the alpha numeric keypad, enter a name for your Multi (see pg. 6-19 in the manual for details on using the alphanumeric keypad):


-
- Done. Your custom Multi is now stored to the ID chosen above. To recall at any time, press MULTI, press USER, then use the data wheel, +/- or Multi Select buttons to select.TIP: to recall your Multi even faster, save it as a FAVORITE
. - With your new Multi on screen, feel free to go back to step 2 and add additional zones (up to 4 max).
- Done. Your custom Multi is now stored to the ID chosen above. To recall at any time, press MULTI, press USER, then use the data wheel, +/- or Multi Select buttons to select.TIP: to recall your Multi even faster, save it as a FAVORITE
Question:
How can I store my most needed Programs/Multis as Favorites for quick recall?
Answer:
Much like car radio station presets, the Artis lets you store up to 10 Favorite Programs/Multis for instant one-button recall.
Here’s how:
-
- Select the a Program or Multi you wish to store as a Favorite.Ex:
- Select the a Program or Multi you wish to store as a Favorite.Ex:
-
- Press and hold a given FAVORITES button for a few seconds to store the current Program or Multi to that button location.
- Press and hold a given FAVORITES button for a few seconds to store the current Program or Multi to that button location.
-
- You will see a pop-up message displayed as confirmation:
- You will see a pop-up message displayed as confirmation:
- Go back to step 1 and repeat as needed.
To later recall the given Favorite, from Program or Multi mode, simply press the corresponding FAVORITES button.
Question:
Where can I obtain a list of the factory preset Programs & Multis for the Artis?
Answer:
Under the DOWNLOADS Tab on the Artis Product page (under ‘User Manuals’) you will find a link titled “Artis Factory Objects List”. The download contains both .pdf and .xls files listing all system objects (programs, multis, and effects chains).
In addition Appendix C of the Musician’s Guide also lists all of the factory Programs by category.
Question:
How can I alter the range of the pitch bend wheel in a Multi?
Answer:
Pitch bend range is edited per Multi zone.
Here are the steps:
- Select the Multi in question;
- Press EDIT;
- Press MIDI (soft button);
- Press the Zone (soft button) to select the Zone you are trying the alter the Pitch Bend on.Keep your eye on the Zone field parameter in the top center of the screen – this indicates which zone you are editing currently. For ex., in the screen below Zone 1 (of a total of 4) is currently in edit focus.
- Change the Bend Range Up and Bend Range Down fields as needed*:
*(ST = semitone; 12 semitones = 1 octave)
- Go back to step 4 and repeat for other zones as needed.
- Save your Multi.


Note: Most sounds (being sample based) will have an upward bend range limit, meaning after a certain interval, the samples will stop transposing upwards and thus (potentially) sound out of tune. This is normal and the limit will vary program to program. Downward bend ranges are not effected by this.
Question:
How can I use MIDI Bank and Program Changes to select Multis remotely?
Answer:
To select Multis via MIDI you need to go into the Global/MIDI mode and set the “Local Key Channel” (manual ref. pg 9-10) to match the one channel you are wanting to send bank/program changes to the Artis on.
Once the Local Key Channel is set, put the Artis into Multi mode and send a:
- cc32/Bank LSB message (value range = 0-4), followed by
- program change (value range = 0-127)
MIDI ‘Banks’ are in groups of 128 entries, 0-127.
So for example, if you wanted to select Multi #168 SynBass/Strings you would send:
- cc32 = 1
- Pchg = 40
The way to figure this out is fairly simple:
- Multi# ÷ 128 = B (where B = MIDI Bank and is the whole number to the left of any decimal point)
- Multi# – (B x 128) = program change number
Be sure too that you are running the latest OS. The latest update is available here.
Question:
How can I assign a switch pedal to navigate my Programs/Multis/Favorites?
Answer:
-
- With the Artis power turned off, connect a switch pedal to either SW1 or SW2.NOTE: each Artis switch pedal input supports using either single (1/4″ TS) or dual (1/4″ TRS) switch pedals. This permits up to 4 switch pedals (when two dual pedals are used).
- In the GLOBAL Mode, using the PARAM/CHANNEL buttons, select the Pedal Override parameter that corresponds to the physical input you connected your pedal to. As each pedal input can support single or dual pedals, there are four total possibilities to chose from: SW1a, SW1b, SW2a, SW2b. If only using single pedals, only the ‘a’ side parameter is used.For ex: if you connect a single pedal to SW2, select “Pedal SW2a Override”.
- There are 4 options to choose from related to navigating on-screen selections with a pedal. Using the data wheel, choose the one that suits your needs:
DataInc Move forwards through the list of Programs or Multis. DataDec Move backwards through the list Programs or Multis.
FavoriteInc* Move forwards through the list of stored Favorites. FavoriteDec* Move backwards through the list of stored Favorites. *NOTE: when choosing one of the “Favorites”, the list will cycle/wrap around the 10 available button slots.
Question:
How can I choose a new Aux FX chain for my Multi and adjust the send levels per zone?
Answer:
The Artis offers one global Aux FX per Multi with individually adjustable Send Levels per zone.

The Auxiliary Effect (Aux FX) used in a given Multi is determined by the:
and
The amount of chosen Aux FX heard in each zone is determined by the:
Aux FX Channel
When the “AuxFx” parameter (see below) is set to “0 None” (the default), the Aux FX Channel parameter specifies which Program’s built-in Aux FX Chain will be used as the one Aux FX Chain for the entire Multi.
For ex, if the Aux FX Channel parameter is set to Ch1 (the default), then the built-in Aux FX associated with whatever program is on channel 1 of your Multi will be what gets used for all zones of the Multi. This makes it easy to use the same reverb, for ex., for your Multi that the primary program is already using in Program mode.
You can, however, set the Aux FX Channel to *any* of the MIDI channels currently in use within the Multi.
Here’s how to change the the Aux Effect Channel:
-
- With the desired Multi selected, press the soft [EDIT] button.
- With the desired Multi selected, press the soft [EDIT] button.

-
- Press the [COMMON] soft button. Use the PARAM buttons to highlight the “Aux FX Channel”:
- Press the [COMMON] soft button. Use the PARAM buttons to highlight the “Aux FX Channel”:

-
- Use the [previous/-] [next/+] buttons, data wheel and/or alphanumeric keypad to choose the desired MIDI channel.For ex. here we have chosen channel 2. As such, the Aux FX built-in to the program on channel 2 will be what is used for all zones of this Multi.
- Use the [previous/-] [next/+] buttons, data wheel and/or alphanumeric keypad to choose the desired MIDI channel.For ex. here we have chosen channel 2. As such, the Aux FX built-in to the program on channel 2 will be what is used for all zones of this Multi.

- Press [SAVE] to store your changes.
AuxFx (Override)
Instead of using the Aux FX of one of the existing Programs in your Multi (Aux FX Channel, above), the Aux FX Chain for your Multi can also be manually selected, overriding the Aux FX Channel, allowing you to choose from amongst hundreds of built-in FX combinations (for a complete list of FX Chains, download the “Artis Series Factory Objects List“).
Here’s how to manually select an FX Chain for your Multi:
-
- With the desired Multi selected, press the soft [EDIT] button.
- With the desired Multi selected, press the soft [EDIT] button.
-
- Press the [COMMON] soft button. As needed, use the PARAM buttons to highlight “AuxFX”:
Set to ‘0 None’ by default, this indicates no manual selection has been made and currently the Aux FX being heard are those as set by the “Aux FX Channel” selection (above).
- Press the [COMMON] soft button. As needed, use the PARAM buttons to highlight “AuxFX”:

-
- Use the [previous/-] [next/+] buttons, data wheel and/or alphanumeric keypad to select a new FX Chain for this Multi.For ex. here we have chosen FX Chain “5 Small Hall”. As such, “5 Small Hall” will be the FX Chain used in this Multi.
- Use the [previous/-] [next/+] buttons, data wheel and/or alphanumeric keypad to select a new FX Chain for this Multi.For ex. here we have chosen FX Chain “5 Small Hall”. As such, “5 Small Hall” will be the FX Chain used in this Multi.

- Press [SAVE] to store your changes.
Aux Send Levels
Once you have determined what FX Chain is to be used for your Multi, adjusting the Aux Send Levels is the final step. This allows you to determine how much of the chosen effect (wet/dry) will get applied to each zone.
Here’s how to set the Aux Send Level per zone:
-
- With the desired Multi selected, press the soft [EDIT] button.
- With the desired Multi selected, press the soft [EDIT] button.
-
- On the [MAIN] page, use the PARAM buttons to highlight the “Aux Send Level” parameter:
- Press the [Zone] soft button to advance through and select the desired Zone to adjust first:For ex. here we have chosen Zone 3.
Note: by default the Aux Send Level may be set to ‘Program’. This means the current zone is using the preset default FX levels as set within the given Program.
- On the [MAIN] page, use the PARAM buttons to highlight the “Aux Send Level” parameter:


-
- Use the [previous/-] [next/+] buttons, data wheel and/or alphanumeric keypad, to change the Aux Send Level to any desired amount (range = 0-127). Remember this is the send level for just the currently selected zone:For ex. here we have chosen “75” and this only applies to Zone 3.
- Go back and repeat steps 3 and 4 until all zones are set as desired.
- Use the [previous/-] [next/+] buttons, data wheel and/or alphanumeric keypad, to change the Aux Send Level to any desired amount (range = 0-127). Remember this is the send level for just the currently selected zone:For ex. here we have chosen “75” and this only applies to Zone 3.

- Press [SAVE] to store your changes.
Product Comparisons
Program Mode
Question:
When I step on the sustain pedal using a KB3-based program, it is currently controlling the leslie rotor speed. How can I change that to traditional sustain operation?
Answer:
Here is how to reassign SW 1 to act as a traditional sustain pedal for KB3-based programs:
-
- Leave the sustain pedal connected as usual (to the SW 1 pedal jack).
- Go to the GLOBAL mode.
- Using the Param/Channel buttons, highlight the “Rotary S/F Override” parameter:
- Using the data wheel, set it to “Variation”:
NOTES:
“Variation+Sustain” = the Variation (Rotary S/F) button AND the sustain pedal will control the leslie rotary speed.
“Variation” = only the Variation (Rotary S/F) button will control the leslie rotary speed; the sustain pedal will act as traditional sustain.
- Press PROGRAM to return to Program mode.
Now all KB3-generated programs will use the Sustain/SW1 pedal for sustain.
Question:
How can I customize the Artis’ touch sensitivity?
Answer:
-
- Press the mode button – you will see:
- Using the cursor navigation arrow buttons, highlight the “Velocity Map” parameter.
- Using the alpha wheel and/or Previous/- Next/+ buttons, adjust to taste:
- Press the
The default map (Medium) provides the widest range of velocity expression, but you may want to choose a different map if the default does not suit your playing style. You can select from any of the following settings:
| Light Lighter Lightest |
Makes it increasingly easier to produce high MIDI velocity values for the same key strike velocity. These maps work best for those preferring a light touch. |
| Medium | The Artis default map. Medium, allows MIDI velocities to pass unchanged. It follows a linear response. |
| Hard Harder Hardest |
Makes it increasingly harder to produce high MIDI velocity values for the same key strike velocity. These maps work best for those with a heavy touch. |
| PianoTouch | Simulates the general velocity response of an acoustic piano, and is best suited for playing acoustic piano programs. |
| Easy Touch | Similar to the “Light” settings. Makes higher velocities easier to play, but allows more sensitive control over playing high velocities by not boosting the MIDI velocity for fast strike velocities as much as it does for medium strike velocities. |
| GM Receive | Mimics the velocity response commonly used by keyboards that use the General MIDI (GM) sound set. The GM Receive map makes medium strike velocities produce higher MIDI velocities compared to the Linear map. |
- Press PROGRAM or MULTI to exit the Global menu. Your setting selection will be remembered across power cycles.
Question:
How can I combine two or more programs together in layer and/or split fashion?
Answer:
The Artis Multi mode is the ideal place to construct performance layers and splits. Each Multi permits the combination of up to 4 unique program zones. Multis can be built completely from scratch from within Multi mode itself or, for a faster start, using the dedicated front-panel “Layer” and “Split” soft button tools which simplify the process.
(complete parameter details can be found in Chpt. 7 & 8 of the Musician’s Guide).
Here are the basic steps for creating Split and Layer combinations:
-
- From Program mode, select the initial sound you wish to start with – for ex below we have selected a piano program:
- From here you can proceed following one of two paths adding a SPLIT OR a LAYER zone:
(a) Press “SPLIT” to create a split zone: OR (b) Press “LAYER” to create a layer zone:
- From Program mode, select the initial sound you wish to start with – for ex below we have selected a piano program:
-
- Next, press PROG and select the desired Program to use for this new split or layer zone:
(a) For ex, here we chose an acoustic bass: OR (b) For ex, here we chose a synth pad:
- Next, press PROG and select the desired Program to use for this new split or layer zone:
-
- If desired, press VOLUME and change the Volume balance between this new zone and the primary program (Piano in our ex):Note: this is a ‘balance’ control. Positive values will lower the primary program volume; negative values lower the volume of the newly added zone.
(a) For ex, here we raised the volume of the bass:
(lowers the piano)OR (b) For ex, here we lowered the volume of the pad:
- If desired, press VOLUME and change the Volume balance between this new zone and the primary program (Piano in our ex):Note: this is a ‘balance’ control. Positive values will lower the primary program volume; negative values lower the volume of the newly added zone.
-
- If needed, press XPOSE and change the Transposition (Xpose) of the newly added zone by +/- 2 octaves (in semitones):
(a) Here we opted to raise the bass an octave: OR (b) Here we chose to NOT transpose the pad:
- If needed, press XPOSE and change the Transposition (Xpose) of the newly added zone by +/- 2 octaves (in semitones):
-
- Lastly, if this is a split zone, you can press KEY and change the default split-point (B3):TIP: use the ASSIGN feature to select the Split- hold down and press the desired piano key.
(a) Here we chose to change the split point to C3:
- Lastly, if this is a split zone, you can press KEY and change the default split-point (B3):TIP: use the ASSIGN feature to select the Split- hold down
-
- Press the front panel SAVE button (will be lit) to store this Multi the User bank:
- Press the front panel SAVE button (will be lit) to store this Multi the User bank:
-
- By default you are first brought to the ID page. Choose the User ID where you would like to save this Multi to (range #257-512):For ex, we chose ID #258:
- By default you are first brought to the ID page. Choose the User ID where you would like to save this Multi to (range #257-512):For ex, we chose ID #258:
-
- Press the NAME soft button to name your Multi creation:
- Press the NAME soft button to name your Multi creation:
-
- Using the alpha numeric keypad, enter a name for your Multi (see pg. 6-19 in the manual for details on using the alphanumeric keypad):
(a) Press “Save” when done: OR (b) Press “Save” when done:
- Using the alpha numeric keypad, enter a name for your Multi (see pg. 6-19 in the manual for details on using the alphanumeric keypad):
-
- Done. Your custom Multi is now stored to the ID chosen above. To recall at any time, press MULTI, press USER, then use the data wheel, +/- or Multi Select buttons to select.TIP: to recall your Multi even faster, save it as a FAVORITE
. - With your new Multi on screen, feel free to go back to step 2 and add additional zones (up to 4 max).
- Done. Your custom Multi is now stored to the ID chosen above. To recall at any time, press MULTI, press USER, then use the data wheel, +/- or Multi Select buttons to select.TIP: to recall your Multi even faster, save it as a FAVORITE
Question:
How can I store my most needed Programs/Multis as Favorites for quick recall?
Answer:
Much like car radio station presets, the Artis lets you store up to 10 Favorite Programs/Multis for instant one-button recall.
Here’s how:
-
- Select the a Program or Multi you wish to store as a Favorite.Ex:
- Select the a Program or Multi you wish to store as a Favorite.Ex:
-
- Press and hold a given FAVORITES button for a few seconds to store the current Program or Multi to that button location.
- Press and hold a given FAVORITES button for a few seconds to store the current Program or Multi to that button location.
-
- You will see a pop-up message displayed as confirmation:
- You will see a pop-up message displayed as confirmation:
- Go back to step 1 and repeat as needed.
To later recall the given Favorite, from Program or Multi mode, simply press the corresponding FAVORITES button.
Question:
Where can I obtain a list of the factory preset Programs & Multis for the Artis?
Answer:
Under the DOWNLOADS Tab on the Artis Product page (under ‘User Manuals’) you will find a link titled “Artis Factory Objects List”. The download contains both .pdf and .xls files listing all system objects (programs, multis, and effects chains).
In addition Appendix C of the Musician’s Guide also lists all of the factory Programs by category.
Question:
I am using my Artis with a DAW (or external controller) and need to understand what combination of MIDI Bank and Program change messages to send to it to call up the sounds I need.
Answer:
Here is what the Artis needs to receive when selecting programs via MIDI:
-
- MIDI Bank messageBy default*, the Artis uses MIDI Bank message cc#32 (aka Bank LSB) value = 0-127, to send/receive bank info.*(BankSel: 0/32 – set in the Global menu)
- MIDI Program Change messageFollowing the Bank message, a standard Program Change is used value= 0-127 to select the desired program from within the designated bank.
The table below shows the MIDI Bank (column 1) and Program Change (column 2) values needed to select any given Artis Program via MIDI. Note all banks are 128 entries deep:
Values Sent To Artis Artis Program Selected MIDI Bank #
(cc#32 value)Program Change ID Range 0 0-127 1-128 Factory 1 0-127 129-256 Factory 2 0-127 257-384 User 3 0-127 385-512 User Important Note: the Artis displays the program change numbers on screen off by “1” ID# higher.
ie MIDI Program Change #0 = Artis Screen ID# 1.
Examples:
Ex 1: You want to call up #33 Stevie’s Rhds:
From your DAW (or alternate controller), you send:
MIDI Bank (cc32) = 0 *Program Change = 32 *Reminder: the Artis displays the program change numbers on screen off by “1” ID# higher.
Ex 2: You want to call up #161 SuperSaw:
From your DAW (or alternate controller), you send:
MIDI Bank (cc32) = 1 *Program Change = 32 *Note: 161-128-1= #32.
(ie Program #161 is the 32nd program in MIDI Bank 1.)
Ex. 3:You want to call up #512 in the User bank:
From your DAW (or alternate controller), you send:
MIDI Bank (cc32) = 3 *Program Change = 127 *Note: 512 – (128×3) – 1 = 127
(i.e. Program #512 is the 127th program in MIDI Bank 3)
Question:
How can I preset a fixed volume for an individual Program?
Answer:
There is no way to edit the static volume of an entire patch at the Program level but you can achieve this via Multis.
The idea is to make a 1-zone Multi out of each individual program you want independent volume control over and, using the Multi Editor, set the Entry Volume. Then, if desired, store the Multi(s) in your Favorites instead of using the raw factory Program.
There are a few ways to go about this but here is one simple approach:
- Go to Multi Mode and select Multi ‘#254 Artis Control’ (one of the starter templates):
- Press EDIT:
- On the MAIN page, select your desired Program:
- On the MAIN page, set the ‘Entry Volume’ to taste (range None, 0-127):
- SAVE the Multi, renaming if you wish.
- (Optional) Set this Multi as one of your Favorites
.


Repeat as needed.
Question:
How can I assign a switch pedal to navigate my Programs/Multis/Favorites?
Answer:
-
- With the Artis power turned off, connect a switch pedal to either SW1 or SW2.NOTE: each Artis switch pedal input supports using either single (1/4″ TS) or dual (1/4″ TRS) switch pedals. This permits up to 4 switch pedals (when two dual pedals are used).
- In the GLOBAL Mode, using the PARAM/CHANNEL buttons, select the Pedal Override parameter that corresponds to the physical input you connected your pedal to. As each pedal input can support single or dual pedals, there are four total possibilities to chose from: SW1a, SW1b, SW2a, SW2b. If only using single pedals, only the ‘a’ side parameter is used.For ex: if you connect a single pedal to SW2, select “Pedal SW2a Override”.
- There are 4 options to choose from related to navigating on-screen selections with a pedal. Using the data wheel, choose the one that suits your needs:
DataInc Move forwards through the list of Programs or Multis. DataDec Move backwards through the list Programs or Multis.
FavoriteInc* Move forwards through the list of stored Favorites. FavoriteDec* Move backwards through the list of stored Favorites. *NOTE: when choosing one of the “Favorites”, the list will cycle/wrap around the 10 available button slots.
Troubleshooting
Question:
What is involved in replacing the Artis’s fuse?
Answer:
- Power off and disconnect the power cord.
- Using a flat head screw driver, gently pry out the fuse holder, directly below the power cord connection.
- Replace the fuse with the same type and rating (should be 315mA/250V slow blow 5x20mm).
- Replace the fuse holder.

Tip: There is a slot in the fuse holder to store a spare fuse if desired.
Question:
How can I restore my Artis to its factory defaults?
Answer:
Caution: Hard resetting will erase all user memory ! Need be, back up any custom programming before proceeding
.
There are two methods for performing a hard reset on the Artis:
GLOBAL MENU METHOD: (with the Artis powered up in normal operating modes)
-
- Press the GLOBAL mode button, then press the “RESET” soft button:
- Press the GLOBAL mode button, then press the “RESET” soft button:

-
- You have two options. You can choose to either:
(a) Press “No” to clear ALL user memory:
(all user Programs/Multis/Global settings will be erased)OR (b) Press “Yes” to reset ONLY the Global mode settings:
(user Programs/Multis will NOT be erased)
- You have two options. You can choose to either:


-
- Confirm your selection by pressing “Yes”:
(a) All user Programs/Multis/Global settings will be erased. OR (b) Only the Global mode settings will be reset:
- Confirm your selection by pressing “Yes”:


- After either selection the Artis will reboot.
SYSTEM MODE METHOD: (useful if you are unable to perform the above Global menu method)
Note: Resetting from the System Mode will clear ALL user Programs/Multis and Global settings.
-
- Turn the unit Off.
- Press and hold the ENTER button while you turn the power on (you can release the ENTER button once you see the System Mode menu).
- Press “System Reset”:
- Press “OK”:
- Press “OK” again:
- Press “Run Artis”:


The Artis will then reboot, at which point it will be completely reset back to factory defaults.
DOWNLOADS |
User Manuals
Artis Getting Started Guide – 1.9 MB
Quick Start Guide (Rev 1)
2014-11-03
Artis Musician’s Guide – 5.4 MB
Primary owner’s manual (Rev D)
2018-08-07
Artis Musician’s Guide – E-Book – 5.7 MB
Primary owner’s manual (revD) – .epub format for e-readers and mobile devices
2018-08-08
Artis Factory Object Lists (1.31) – 40.1 KB
Listing of Factory Programs, Multis and FX Chains (.xls)
2018-09-19
SoundTower – Sound Editor User Guide – 7 MB
PC3 Series Desktop Editor Operating Manual
(applicable to all Kurzweil desktop software editors)
2015-05-28
SoundTower – Artis PlugSE™ Manual – 4.6MB
Operating manual for the Artis, Artis7 and Artis SE PlugSE software.
2015-06-09
OS Updates
Artis v1.31 Update – 4.0 MB
Contains: O/S, Installation Instructions, Release Notes
2018-08-07
Reviews
Keyboard Magazine Review – 3.1 MB
March 2014
2014-03-04
Software Editors
Artis – Desktop Editor (Mac) – 9.2 MB
v2.42 of the Artis desktop editing software for the Mac
(requires Artis OS v1.10)
2014-02-11
Artis – Desktop Editor (PC) – 5.6 MB
v2.42 of the Artis desktop editing software for Windows PC
(requires Artis OS v1.10)
2014-02-11
Artis – iPad Editor – 28.9 MB
(links to App Store store for download)
2014-01-23
Artis – PlugSE (Mac OSX – 32/64bit) – 27.1 MB
v1.0.3 of the Artis Plug-in – (VST and AU formats in 32 and 64-bit)
(requires Artis OS v1.10)
2014-05-15
Artis – PlugSE (PC/VST – 64bit) – 5.8 MB
v1.0.3 of the Artis Plug-in – (VST format 64-bit)
(requires Artis OS v1.10)
2014-05-15
Artis – PlugSE (PC/VST – 32bit) – 5.7 MB
v1.0.3 of the Artis Plug-in – (VST format 32-bit)
(requires Artis OS v1.10)
2014-05-15